(Updating) |
No edit summary Tag: Visual edit |
||
| (70 intermediate revisions by 24 users not shown) | |||
| Line 1: | Line 1: | ||
| − | {{Boss |
+ | {{Infobox Boss |
| + | |image= |
||
| − | |name = Argorok |
||
| + | {{Media |
||
| − | |image = [[File:argorok.png|250px]] |
||
| + | |Render TP= File:TP Argorok Render.png |
||
| ⚫ | |||
| + | |Model TP= File:TP Argorok Model.png |
||
| ⚫ | |||
| + | |Model TPHD= File:TPHD Argorok Model.png |
||
| ⚫ | |||
| ⚫ | |||
| ⚫ | |||
| − | |theme music = <nowiki></nowiki> |
||
| ⚫ | |||
| − | {{!}}[[File:Morpheel - first form.ogg|noicon]] |
||
| − | {{!}}{{Exp|first phase}} |
||
| − | {{!-}} |
||
| − | {{!}}[[File:Argorok.ogg|noicon]] |
||
| − | {{!}}{{Exp|second phase}} |
||
| − | {{!)}} |
||
}} |
}} |
||
| + | |caption= |
||
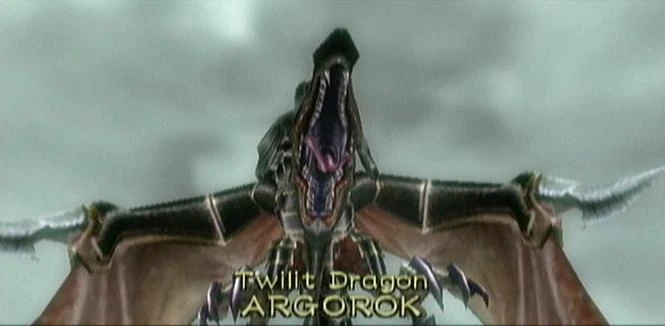
| − | '''''Twilit Dragon:'' Argorok''' is the [[boss]] of the [[City in the Sky]] in {{TP}}. It terrorizes the [[Oocca]] and wreaks havoc on the City in the Sky. |
||
| ⚫ | |||
| ⚫ | |||
| ⚫ | |||
| ⚫ | |||
| ⚫ | |||
| + | |reward= [[Heart Container]]<br/>[[Mirror Shard]] |
||
| + | |theme= |
||
| + | |race=[[Dragon]]}} |
||
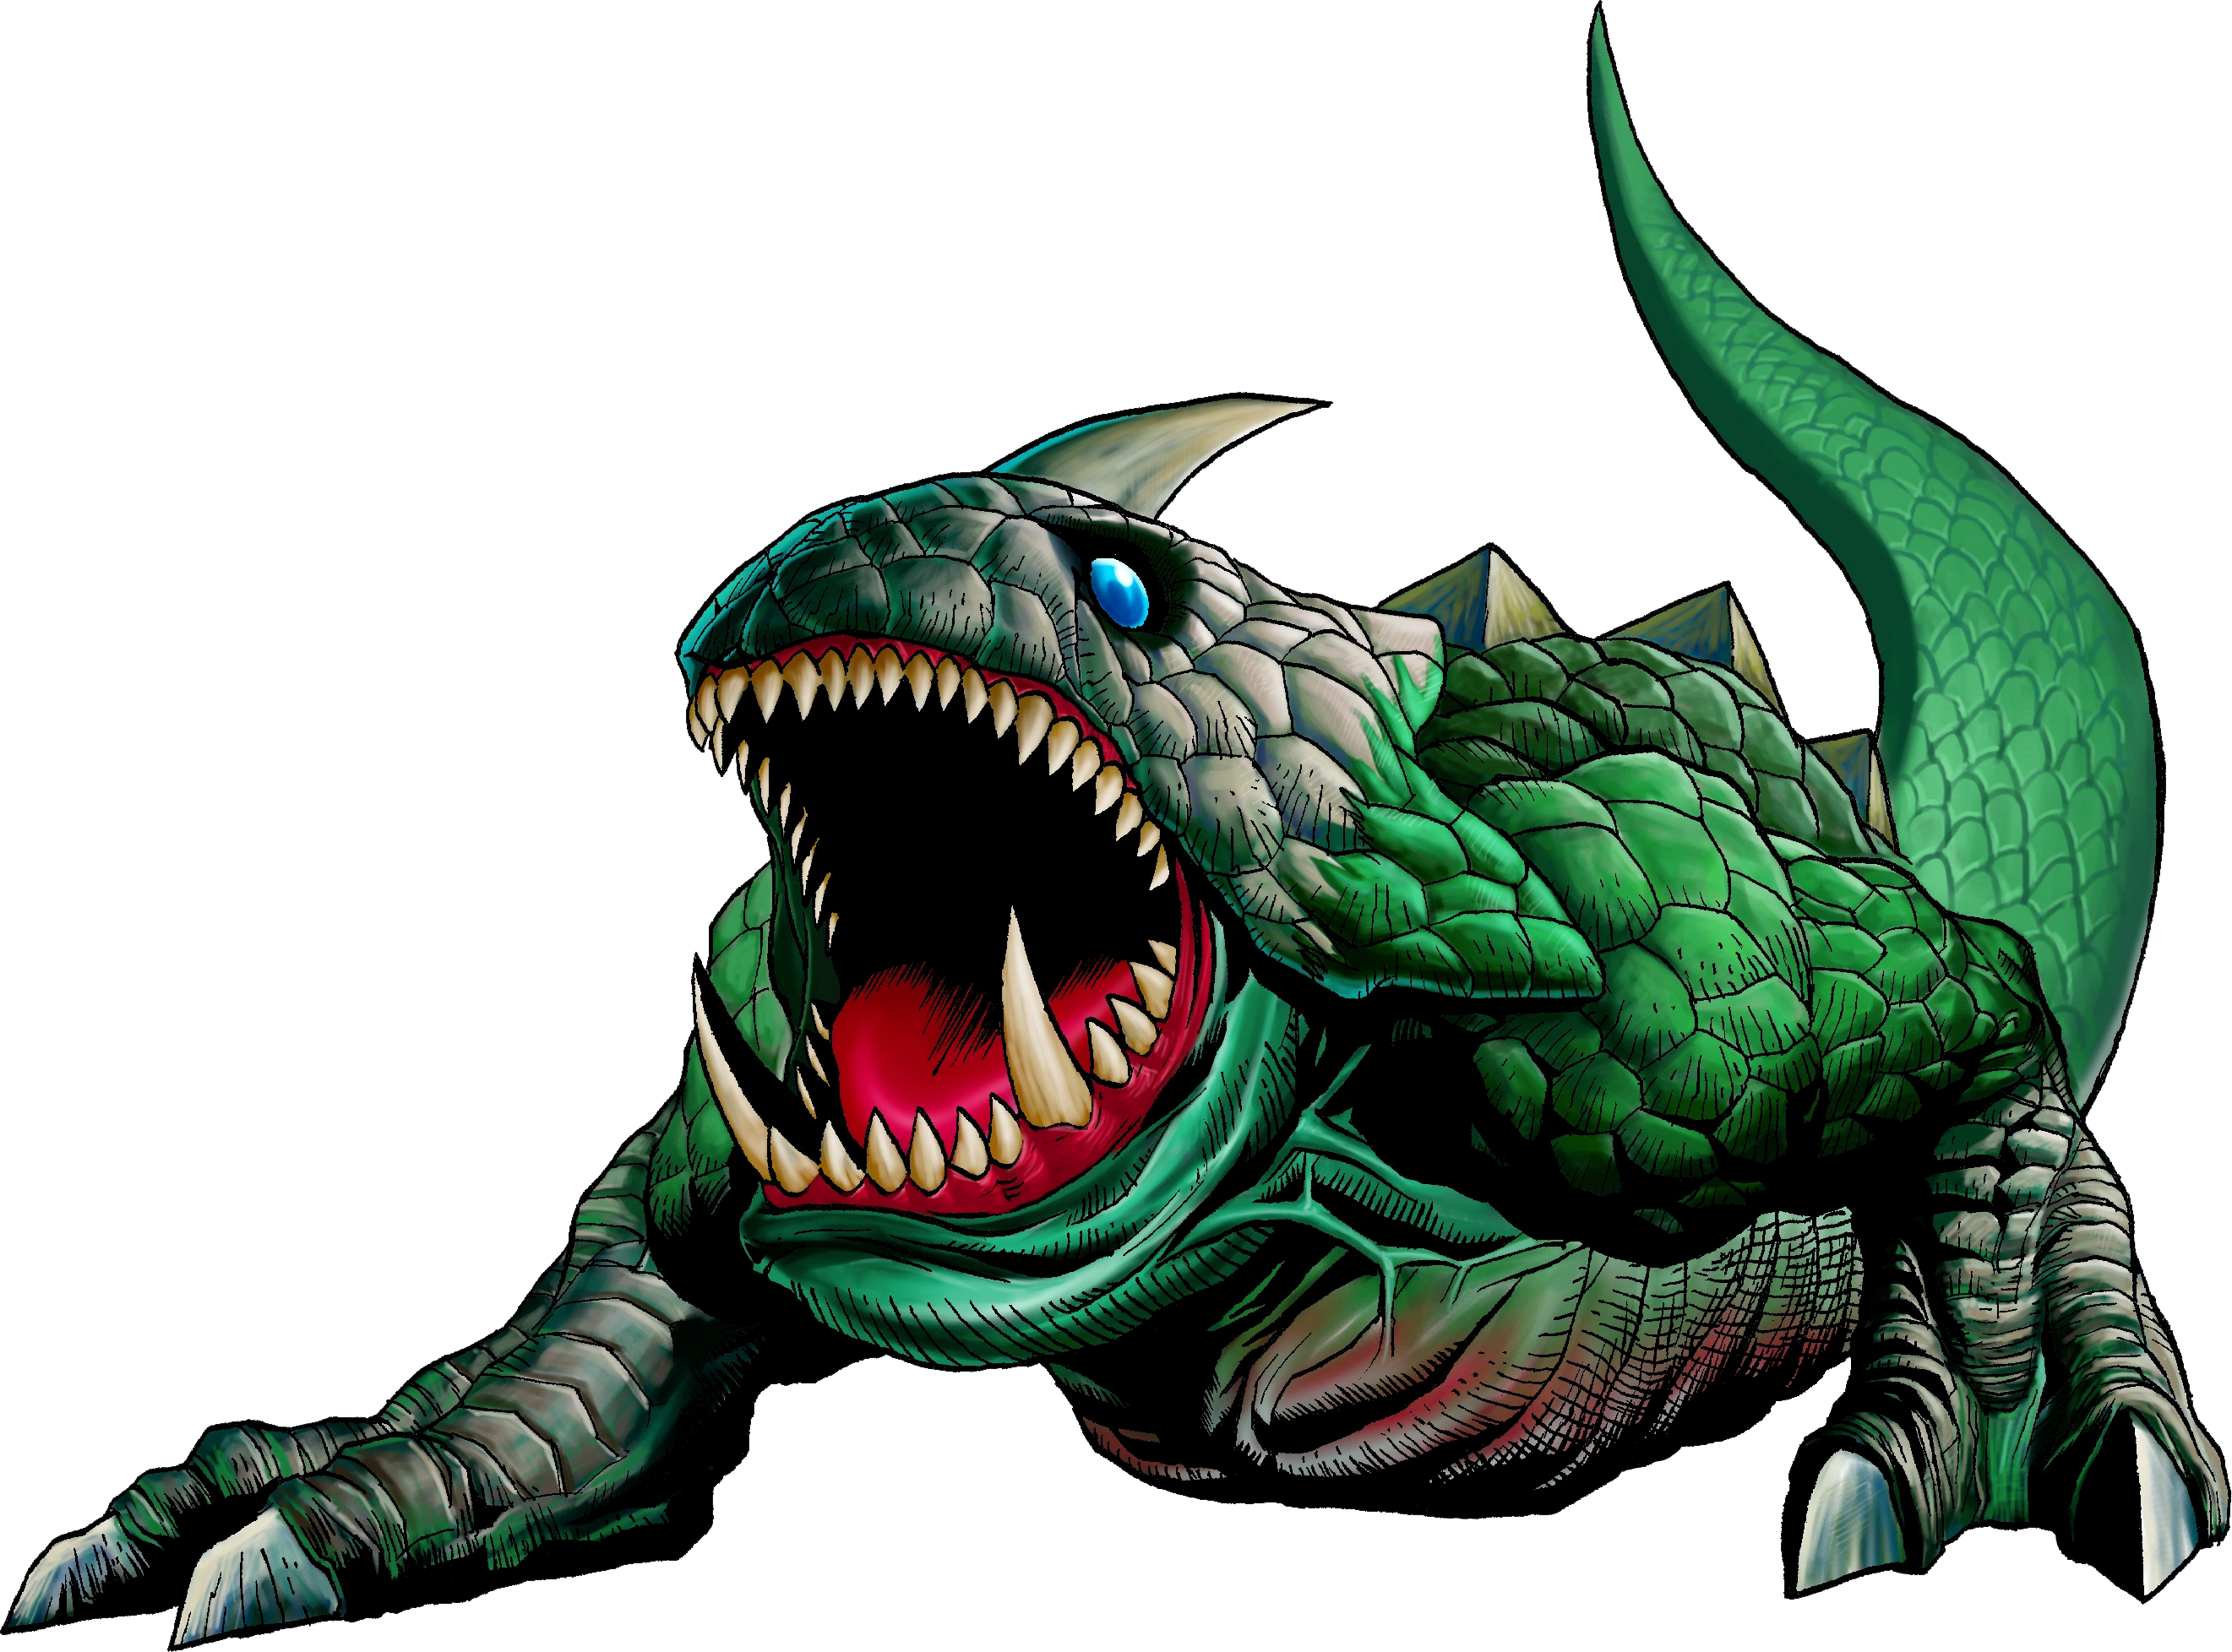
| + | {{Term/Store|Argorok|Argoroks|Series, TP, TPHD, HW, HWL, HWDE}} is a recurring {{Term|Series|Boss}} in {{TLoZ|Series}}.<ref>{{Cite Book|quote= |book= E |publisher= |page= 163 {{Exp Game|TP}}}}</ref>{{Note|{{Term|Series|Argorok}} was referred to as '''Argarok''' on [[Community:Zelda.com|Zelda.com]].<ref>{{Cite Web|quote= Argarok<br/>A ferocious, armour-plated winged dragon.|author= Nintendo|published= n.d.|retrieved= February 17, 2016|url= http://www.zelda.com/tp/|title= {{TP|-}} Monsters|site= Official {{TP|-}} website|type=}}</ref> However, as this contradicts the name given in {{E|-}}, it is not considered [[Guidelines:Canon|Canon]].}} It is a red-orange wyvern covered in black armor, and it terrorizes the [[Oocca]] and wreaks havoc on the City in the Sky.{{Fact}} As [[Link]] explores the City, Argorok can be seen flying overhead in the sky, sent by [[Zant]]. |
||
| − | == |
+ | ==Characteristics== |
| + | {{Midna |
||
| − | + | |quote1= <p>Hey, it's that overgrown bird again. Maybe it's lonely because it can't fly down here...</p><p>Isn't there some spot where we can latch on to it? Then we could pull it down to us!</p><p>That thing's so big, {{Player Name}}! Your weight alone won't pull it down, I'm pretty sure.</p><p>What are you supposed to do in a situation like that? Come on, now! Remember!</p><p>That thing's not going to come down if we just sit here waiting for it...</p><p>You won't have anywhere to run to, but you should try and get close and pull it down again.</p><p>You saw its back, didn't you? I bet that's its weak spot!</p><p>We need to find a way to get up on its back.</p><p>Maybe we could get on its back using those plants floating all around it.</p><p>Its back is its weak spot! Go for that, will you?!</p><p>That's it, keep attacking its weak spot! If you don't stay sharp, that fire will engulf you!</p> |
|
| + | }} |
||
| + | <!-- It looks like a bunch of different comments got mashed into one here - needs in-game verification. If so, these should be split into multiple quotes. -->[[Category:Twilight Princess Articles Needing Attention]] |
||
| − | The battle takes place at the highest point in the dungeon, a flat plain with four steel grated pillars and very strong winds. [[Link]] must go to one of the pillars surrounding the field and climb to the middle of one of the pillars using the [[Clawshot]]. Once |
+ | The battle takes place at the highest point in the dungeon, a flat plain with four steel grated pillars and very strong winds. Argorok will primary attack by swooping down at [[Link]] to deal damage, Link must go to one of the pillars surrounding the field and climb to the middle of one of the pillars using the [[Clawshot|Double Clawshots]]. Link should not stand on the pillars for too long. If he does, Argorok will fly to Link's position and spew out fire at point-blank range, dealing damage. Once on a pillar, Link must wait until Argorok flies up to him and exposes its tail, which he must target with the [[Clawshot]]. Once he has a hold of it, he must equip the [[Iron Boots]] to send Argorok crashing to the ground, destroying some of its armor. After this is done twice, the rest of the armor will break away and reveal a new weak spot on its back. At this point, [[Peahat]]s burst from the ground to serve as extra Clawshot points, and Argorok will remove the rest of its armor. Link must climb to the top of the pillars and use the Peahats to Clawshot his way around the area as Argorok breathes fire at him. Once Argorok pauses, Link must make his way around to its back and jump to the new weak point with the Clawshot. Link must then slash it with the [[Sword]] as the boss falls, eventually depositing him on the ground again. After this strategy is used twice, Argorok changes directions. This process must be repeated until Argorok is defeated. |
| − | + | Once Argorok has been defeated, Link receives the final [[Mirror Shard]] and a [[Heart Container]]. |
|
| − | == |
+ | ==Other Appearances== |
| − | {{Noncanon| |
+ | {{Noncanon|Start}} |
| − | === |
+ | ==={{HW|-}}=== |
In {{HW}}, Argorok appears as a giant boss that is encountered in several [[Legend Mode]] and [[Adventure Mode]] stages. In Legend Mode, it appears in "[[The Shadow King]]" and two in "[[Liberation of the Triforce]]". |
In {{HW}}, Argorok appears as a giant boss that is encountered in several [[Legend Mode]] and [[Adventure Mode]] stages. In Legend Mode, it appears in "[[The Shadow King]]" and two in "[[Liberation of the Triforce]]". |
||
| − | During battle, Argorok stays in flight, making it unreachable |
+ | During battle, Argorok stays in flight, making it unreachable by most attacks. It attacks by charging, kicking up whirlwinds with its wings, and breathing a stream of fire that also surrounds it. While creating whirlwinds, the tip of its tail glows blue, making it vulnerable to the [[Hookshot]], which will latch on and pull Argorok down, revealing its Weak Point Gauge. The Hookshot can also be used while it is breathing fire, but only when its tail is glowing blue, otherwise, the flames will burn the Warrior attempting it. It can also spit a fireball with a moderately large radius, which doesn't leave it open and is very rare. |
| − | In "The Shadow King," Argorok has a unique strategy as it first appears |
+ | In "The Shadow King," Argorok has a unique strategy as it first appears too high in flight for the Hookshot to reach. It appears at different times, where it takes over a [[Keep]] it flies over while attacking the Allied Base with fire balls. Either [[Lana]] or [[Midna]] must be escorted to these Keeps to create a [[Magic Circle]], which upon activation, summons chains that wrap around Argorok. However, it breaks free and temporarily retreats before appearing again shortly thereafter. When the [[Great Fairy]] is summoned later in the battle, she pulls the [[Moon (Object)|Moon]] down and slams it into Argorok, which knocks it down, where it can be fought normally. |
When defeated, Argorok usually drops the Argorok's Embers Silver [[Material]] or the Argorok's Stone Gold Material. |
When defeated, Argorok usually drops the Argorok's Embers Silver [[Material]] or the Argorok's Stone Gold Material. |
||
| − | {{Noncanon| |
+ | {{Noncanon|End}} |
| − | == |
+ | ==Nomenclature== |
| ⚫ | |||
| − | *If Link looks up when he is outside the dungeon's interior, he can see Argorok flying in the sky. |
||
| + | {{Nomenclature}} |
||
| − | *The official ''Twilight Princess'' website misspells its name as "Argarok."<ref>{{Cite web|quote= Argarok<br>A ferocious, armour-plated winged dragon.|author= Nintendo|published= |retrieved= February 17, 2016|url= http://www.zelda.com/tp/|title= ''Twilight Princess'' Monsters|site= Official ''Twilight Princess'' website|type=}}</ref> |
||
| − | *Although referred to as a dragon, its appearance is more reminiscent of {{Wp|Wyvern}}s. |
||
| − | |||
| − | ==Etymology== |
||
| ⚫ | |||
| − | |||
| − | {{Names |
||
| − | |align= left |
||
| − | |en= |
||
| − | |enM= |
||
| − | |ja= {{Japanese|覚醒炎翼竜 ナルドブレア|Kakusei En Yokuryuu Narudoburea}} |
||
| − | |jaM= Awoken Flame Pterosaur: Nardobrear |
||
| − | |es= |
||
| − | |esM= |
||
| − | |esS= Argorok, Dragón de las Sombras |
||
| − | |esSM= Argorok, Dragon of the Shadows |
||
| − | |esL= |
||
| − | |esLM= |
||
| − | |fr= |
||
| − | |frM= |
||
| − | |frF= Pyrodactilus, Ptérosaure Pyrogène du Crépuscule |
||
| − | |frFM= Pyrodactylus, Pyrogen Pterosaur of Twilight |
||
| − | |frC= |
||
| − | |frCM= |
||
| − | |de= {{de|Argorok|Fliegender Feuerdrache Argorok}} |
||
| − | |deM= Flying Fire Dragon Argorok |
||
| − | |it= Argorok, il dragone del crepuscolo |
||
| − | |itM= Argorok, the dragon of the twilight |
||
| − | |pt= |
||
| − | |ptM= |
||
| − | |ptP= |
||
| − | |ptPM= |
||
| − | |ptB= |
||
| − | |ptBM= |
||
| − | |nl= |
||
| − | |nlM= |
||
| − | |ru= |
||
| − | |ruM= |
||
| − | |ko= {{Korean|각성화익룡 아르고록|Gakseong Hwa'ikryong Areugorok}} |
||
| − | |koM= Awakened Fire Pterodactyl: Argorok |
||
| − | |ch= |
||
| − | |chM= |
||
| − | |chT= |
||
| − | |chTM= |
||
| − | |chS= |
||
| − | |chSM= }} |
||
==Gallery== |
==Gallery== |
||
<gallery> |
<gallery> |
||
| − | File: |
+ | File:TP Argorok Intro.jpg|{{Term|TP|Argorok}} from {{TP|-}} |
| + | File:TP Argorok Breathing Fire.jpg|{{Term|TP|Argorok}}'s fire breath from {{TP|-}} |
||
| − | File:argorok1.jpg|Twilit Dragon: Argorok |
||
| + | File:TP Argorok Armorless Model.png|{{Term|TP|Argorok}} without its armor from {{TP|-}} |
||
| − | File:firebreath.jpg|Argorok's fire breath |
||
| − | File: |
+ | File:TP Link Attack Argorok.jpg|{{Term|TP|Argorok}}'s critical point from {{TP|-}} |
| − | File:HW Argorok.png|Argorok from |
+ | File:HW Argorok Render.png|{{Term|HW|Argorok}} from {{HW|-}} |
| + | File:HW Argorok Adventure Mode Icon.png|{{Term|HW|Argorok}} {{Term|HW|Adventure Mode}} icon from {{HW|-}} |
||
| + | File:HWDE Argorok Model.png|{{Term|HWDE|Argorok}} from {{HW|DE|-}} |
||
| + | File:HWDE Argorok Portrait.png|{{Term|HWDE|Argorok}} portrait from {{HW|DE|-}} |
||
| + | File:HWDE Argorok Mini Map Icon.png|{{Term|HWDE|Argorok}} Mini Map icon from {{HW|DE|-}} |
||
</gallery> |
</gallery> |
||
| + | |||
| + | == Trivia == |
||
| + | *{{Term|TPHD|Argorok}} is unique among the {{Plural|TPHD|Boss|link}} of {{TP|-}} in that, rather than being damaged by handheld {{Plural|TPHD|Weapon|link}} during the first battle phase, it only receives damage after {{Term|TPHD|Link|link}} slams it into the ground. |
||
| + | *{{Term|TPHD|Argorok}} is the second {{Term|TPHD|Boss}} in {{TP|-}} to appear early on in a {{Term|TPHD|Dungeon|link}}, the first being {{Term|TPHD|Blizzeta|link}}. |
||
| + | |||
| + | ==See Also== |
||
| + | * {{Term|Series|Dark Argorok|link}} |
||
| + | |||
| ⚫ | |||
{{Ref}} |
{{Ref}} |
||
| Line 99: | Line 69: | ||
{{Bosses|TP}} |
{{Bosses|TP}} |
||
{{SaurianEnemy}} |
{{SaurianEnemy}} |
||
| + | {{Categories |
||
| − | |||
| + | |Dragons, Giant Bosses, Twilight Enemies |
||
| − | [[Category:Dragons]] |
||
| + | |bosses= TP, TPHD, HW, HWL, HWDE |
||
| − | [[Category:Twilight Enemies]] |
||
| + | }} |
||
| − | [[Category:Bosses in Twilight Princess]] |
||
| − | [[Category:Bosses in Hyrule Warriors]] |
||
Latest revision as of 23:54, 16 January 2023
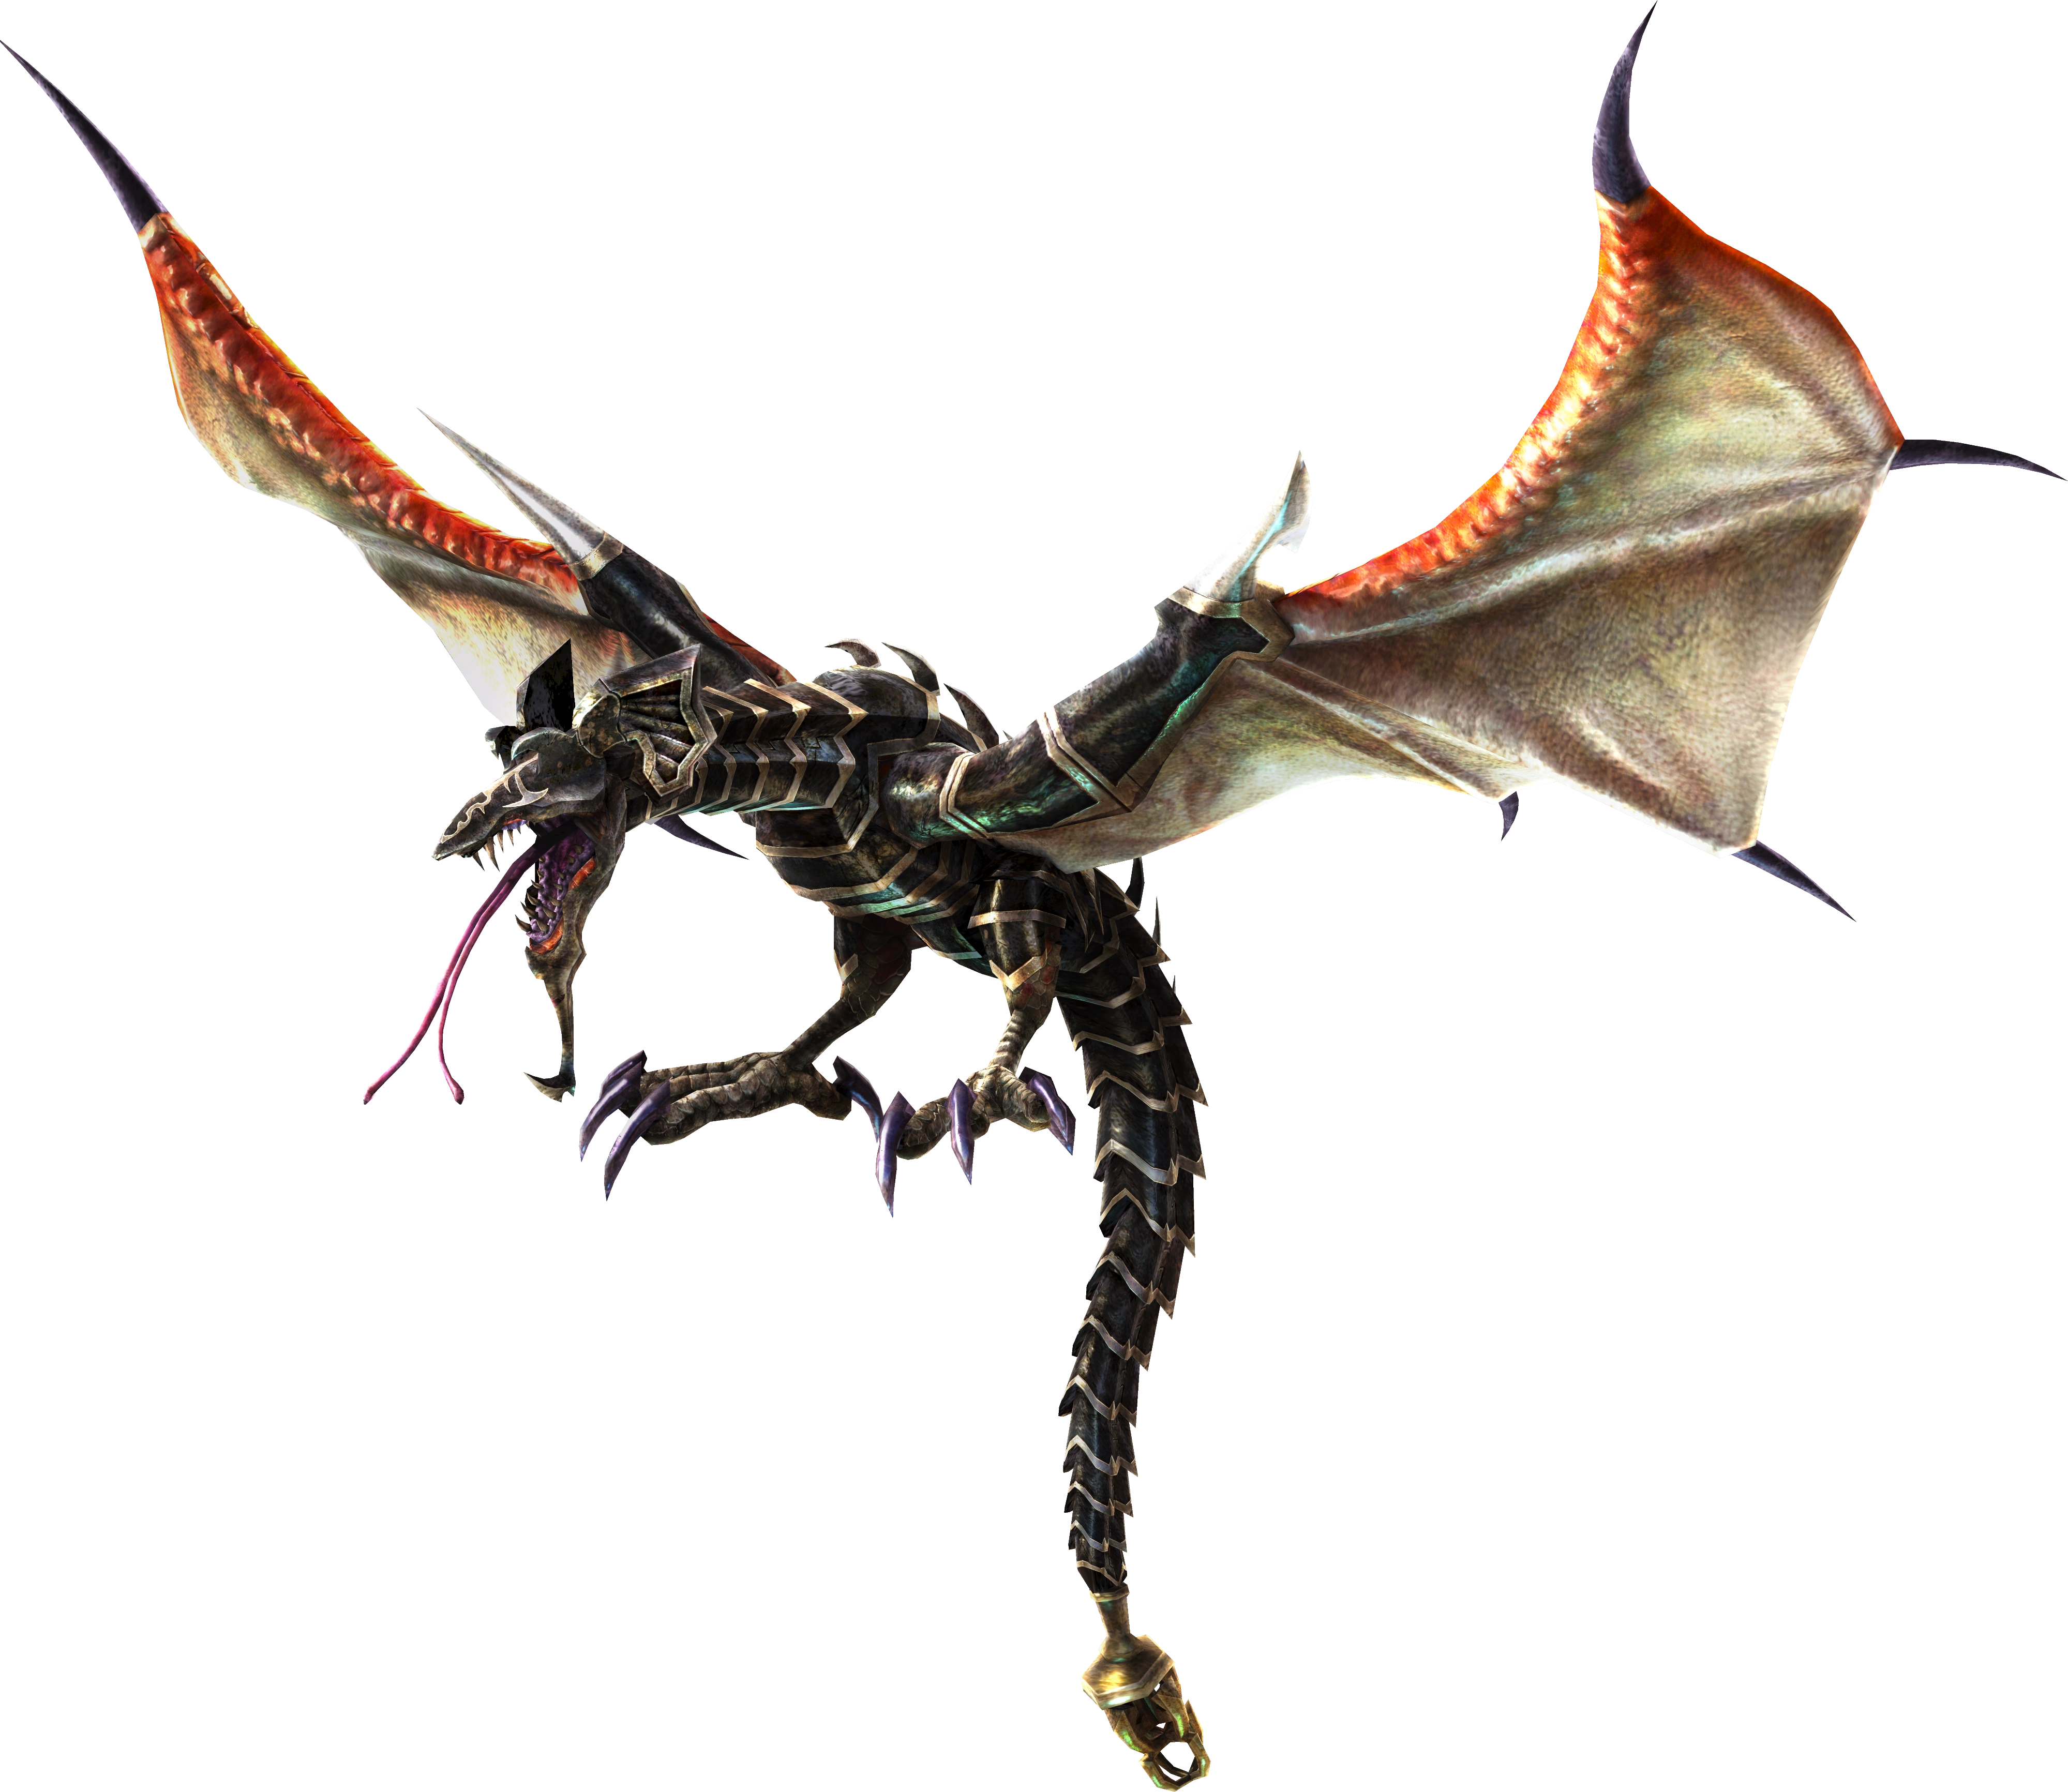
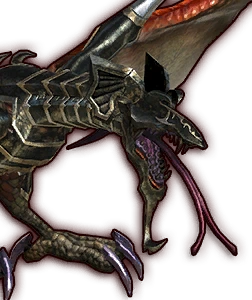
Argorok is a recurring Boss in The Legend of Zelda series.[1][note 1] It is a red-orange wyvern covered in black armor, and it terrorizes the Oocca and wreaks havoc on the City in the Sky.[citation needed] As Link explores the City, Argorok can be seen flying overhead in the sky, sent by Zant.
Characteristics
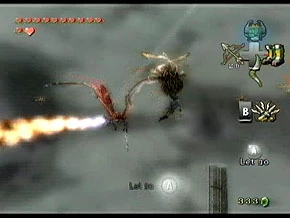
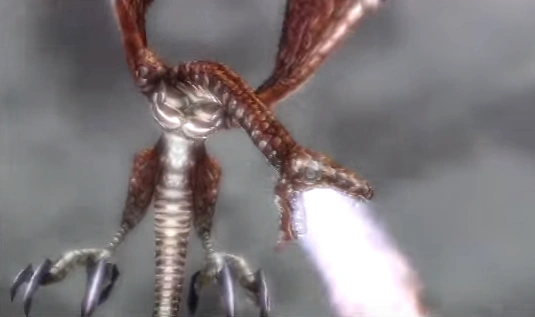
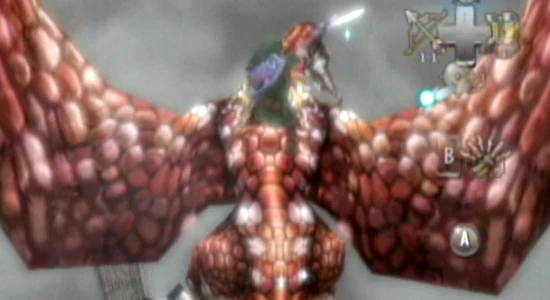
The battle takes place at the highest point in the dungeon, a flat plain with four steel grated pillars and very strong winds. Argorok will primary attack by swooping down at Link to deal damage, Link must go to one of the pillars surrounding the field and climb to the middle of one of the pillars using the Double Clawshots. Link should not stand on the pillars for too long. If he does, Argorok will fly to Link's position and spew out fire at point-blank range, dealing damage. Once on a pillar, Link must wait until Argorok flies up to him and exposes its tail, which he must target with the Clawshot. Once he has a hold of it, he must equip the Iron Boots to send Argorok crashing to the ground, destroying some of its armor. After this is done twice, the rest of the armor will break away and reveal a new weak spot on its back. At this point, Peahats burst from the ground to serve as extra Clawshot points, and Argorok will remove the rest of its armor. Link must climb to the top of the pillars and use the Peahats to Clawshot his way around the area as Argorok breathes fire at him. Once Argorok pauses, Link must make his way around to its back and jump to the new weak point with the Clawshot. Link must then slash it with the Sword as the boss falls, eventually depositing him on the ground again. After this strategy is used twice, Argorok changes directions. This process must be repeated until Argorok is defeated.
Once Argorok has been defeated, Link receives the final Mirror Shard and a Heart Container.
Other Appearances
Hyrule Warriors
In Hyrule Warriors, Argorok appears as a giant boss that is encountered in several Legend Mode and Adventure Mode stages. In Legend Mode, it appears in "The Shadow King" and two in "Liberation of the Triforce".
During battle, Argorok stays in flight, making it unreachable by most attacks. It attacks by charging, kicking up whirlwinds with its wings, and breathing a stream of fire that also surrounds it. While creating whirlwinds, the tip of its tail glows blue, making it vulnerable to the Hookshot, which will latch on and pull Argorok down, revealing its Weak Point Gauge. The Hookshot can also be used while it is breathing fire, but only when its tail is glowing blue, otherwise, the flames will burn the Warrior attempting it. It can also spit a fireball with a moderately large radius, which doesn't leave it open and is very rare.
In "The Shadow King," Argorok has a unique strategy as it first appears too high in flight for the Hookshot to reach. It appears at different times, where it takes over a Keep it flies over while attacking the Allied Base with fire balls. Either Lana or Midna must be escorted to these Keeps to create a Magic Circle, which upon activation, summons chains that wrap around Argorok. However, it breaks free and temporarily retreats before appearing again shortly thereafter. When the Great Fairy is summoned later in the battle, she pulls the Moon down and slams it into Argorok, which knocks it down, where it can be fought normally.
When defeated, Argorok usually drops the Argorok's Embers Silver Material or the Argorok's Stone Gold Material.
Nomenclature
Argorok is a play on "Argo", an archaic term for the Ancient Greeks, whose architecture the City in the Sky resembles, and "rok", a term used in the series for dragon enemies. It may also be a play on Kargarok, a similar, more common enemy that resembles a bird.
| Language | Name | ||
|---|---|---|---|
| German | Argorok | ||
| This table was generated using translation pages. To request an addition, please contact a staff member with a reference. | |||
Gallery

Argorok from Twilight Princess
Argorok's fire breath from Twilight Princess
Argorok without its armor from Twilight Princess
Argorok's critical point from Twilight Princess
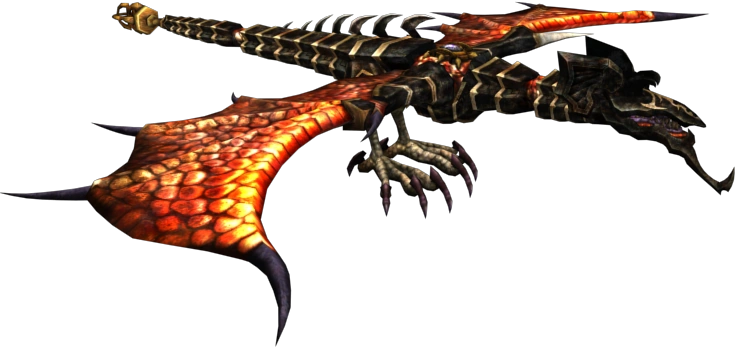
Argorok from Hyrule Warriors
Argorok Adventure Mode icon from Hyrule Warriors
Argorok from Hyrule Warriors: Definitive Edition
Argorok portrait from Hyrule Warriors: Definitive Edition
Argorok Mini Map icon from Hyrule Warriors: Definitive Edition
Trivia
- Argorok is unique among the Bosses of Twilight Princess in that, rather than being damaged by handheld Weapons during the first battle phase, it only receives damage after Link slams it into the ground.
- Argorok is the second Boss in Twilight Princess to appear early on in a Dungeon, the first being Blizzeta.
See Also
Notes
References
- ↑ Encyclopedia, Dark Horse Books, pg. 163 (TP)
- ↑ "Argarok
A ferocious, armour-plated winged dragon." — Nintendo, Twilight Princess Monsters, Official Twilight Princess website, published n.d., retrieved February 17, 2016.
Mazura · Jermafenser · Rebonack · Carock · Gooma · Barba · Thunderbird ![]() · Link's Shadow
· Link's Shadow
Light World
Ball and Chain Trooper ![]() · Six Armos Knights · Lanmola Trio · Moldorm · Agahnim
· Six Armos Knights · Lanmola Trio · Moldorm · Agahnim ![]()
Dark World
Helmasaur King · Arrghus · Mothula · Blind the Thief · Kholdstare · Vitreous · Trinexx · Ganon
Super Helmasaur · Super Arrghus · Super Mothula · Super Blind · Dark Links![]()
Bosses
Moldorm · Genie · Slime Eye · Angler Fish (2D) · Slime Eel · Facade · Evil Eagle (2D) · Hot Head · Shadow Nightmares
Guardians
Rolling Bones ![]() · King Moblin
· King Moblin ![]() · Hinox
· Hinox ![]() · Dodongo Snakes x2
· Dodongo Snakes x2 ![]() · Lanmola
· Lanmola ![]() · Cue Ball
· Cue Ball ![]() · Master Stalfos x4 · Gohma Twins · Armos Knight
· Master Stalfos x4 · Gohma Twins · Armos Knight ![]() · Smasher
· Smasher ![]() · Grim Creeper · Turtle Rock · Blaino
· Grim Creeper · Turtle Rock · Blaino
Bosses
Gohma · King Dodongo · Barinade · Phantom Ganon · Volvagia · Morpha · Bongo Bongo · Twinrova · Ganondorf · Ganon
Middle Bosses
Lizalfos · Big Octo · Stalfos · Meg · Flare Dancer · White Wolfos · Dark Link · Dead Hand · Gerudo Thief · Iron Knuckle · Dynalfos
Bosses
Odolwa · Goht · Gyorg · Twinmold · Majora ![]()
Middle Bosses
Dinolfos · Gekko · Wizzrobe · Gerudo Pirate · Wart · Gekko and Mad Jelly
Captain Keeta · Iron Knuckle · Sharp · Igos du Ikana · Garo Master · Gomess · Eyegore
Bosses
Aquamentus · Dodongo · Mothula · Gohma · Digdogger · Manhandla · Gleeok · Medusa Head · General Onox ![]()
Sub-Bosses
Brother Goriyas · Facade ![]() · Omuai · Agunima · Great Moblin
· Omuai · Agunima · Great Moblin ![]() · Syger · Vire
· Syger · Vire ![]() · Poe Sisters · Frypolar
· Poe Sisters · Frypolar
Bosses
Pumpkin Head · Head Thwomp (2D) · Shadow Hag · Eyesoar · Smog · Octogon · Possessed Nayru · Plasmarine · Ramrock · Veran ![]()
Sub-Bosses
Giant Ghini · Swoop · Subterror · Armos Warrior · Great Moblin ![]() · Smasher · Vire
· Smasher · Vire ![]() · Angler Fish (2D) · Blue Stalfos
· Angler Fish (2D) · Blue Stalfos
Bosses
Gohma · Kalle Demos · Gohdan · Helmaroc King · Jalhalla · Molgera · Puppet Ganon ![]() · Ganondorf
· Ganondorf
Minibosses
Green Bokoblin · Moblin · Mothula · Darknut · Cyclos · Phantom Ganon · Stalfos · Wizzrobe · Mighty Darknut · Big Octo![]()
Bosses
Phantom Ganon ![]() · Stone Arrghus · Helmaroc King · Big Poe · Big Moldorm x2 · Frostare · Vaati · Ganon
· Stone Arrghus · Helmaroc King · Big Poe · Big Moldorm x2 · Frostare · Vaati · Ganon
Sub-Bosses
Chief Soldier · Shadow Link ![]() · Manhandla · Dodongos · Big Dark Stalfos · Gohma · Big Dodongo
· Manhandla · Dodongos · Big Dark Stalfos · Gohma · Big Dodongo
Bosses
Big Green Chuchu ![]() · Gleerok · Mazaal · Big Octorok
· Gleerok · Mazaal · Big Octorok ![]() · Gyorg Pair · Vaati
· Gyorg Pair · Vaati ![]()
Sub-Bosses
Madderpillar ![]() · Dark Nut · Big Blue Chuchu
· Dark Nut · Big Blue Chuchu ![]() · Red Dark Nut · Black Knight
· Red Dark Nut · Black Knight
Bosses
Diababa · Fyrus · Morpheel · Stallord · Blizzeta · Armogohma · Argorok · Zant · Puppet Zelda · Ganon · Ganondorf ![]()
Sub-Bosses
Ook · King Bulblin · Dangoro · Twilit Carrier Kargarok · Twilit Bloat · Deku Toad · Death Sword · Darkhammer · Darknut · Aeralfos · Phantom Zant
Bosses
Stagnox · Fraaz · Phytops · Cragma · Byrne · Skeldritch · Demon Train · Chancellor Cole · Malladus
Stagnox II · Fraaz II · Phytops II · Cragma II · Skeldritch II · Dark Link![]()
Sub-Bosses
Mothula · Geozard · Rocktite · Ice Keese · Freezard · White Wolfos · Geozard Chief · Big Blin ![]() · Snapper · Helmet Chuchu · Metal Chuchu · Stalfos · Heatoise · Stalfos Warrior · Gerune · Ergtorok ·
· Snapper · Helmet Chuchu · Metal Chuchu · Stalfos · Heatoise · Stalfos Warrior · Gerune · Ergtorok ·
Bosses
Ghirahim ![]() · Scaldera · Moldarach · The Imprisoned
· Scaldera · Moldarach · The Imprisoned ![]() · Koloktos · Tentalus · Levias
· Koloktos · Tentalus · Levias ![]() · Bilocyte
· Bilocyte ![]() · Demise
· Demise
Sub-Bosses
Stalfos · Lizalfos · Stalmaster · Moldarach · LD-002G Scervo · Dark Lizalfos · Magmanos · Moldorm · Dreadfuse
Bosses
Yuga ![]() · Moldorm · Margomill · Gemesaur King · Arrghus · Knucklemaster · Stalblind · Zaganaga · Dharkstare · Grinexx · Yuga Ganon
· Moldorm · Margomill · Gemesaur King · Arrghus · Knucklemaster · Stalblind · Zaganaga · Dharkstare · Grinexx · Yuga Ganon
Sub-Bosses
Armos · Red Stalfos · Heedles · Green & Red Goriyas · Gigabari · Gibdos & Purple Mini-Moldorms · Red Eyegores · Flying Tiles & Devalants · Big Pengator & Pengators · Fire Gimos · Moldorm · Lorule Ball and Chain Soldier · Arrghus
StreetPass Bosses
Bosses
Margoma · Arrghus · Moldorm · Blizzagia · The Lady's Pets ![]() · Stalchampion · Prismantus · The Lady
· Stalchampion · Prismantus · The Lady
Shadow Link x3![]()
Mini-Bosses
Electric Blob King · Electric Blob Queen · Hinox Brothers · Freezlord · Vulture Vizier · Grim Repoe · Gigaleon
Bosses
Windblight Ganon · Fireblight Ganon · Master Kohga · Thunderblight Ganon · Waterblight Ganon · Calamity Ganon · Dark Beast Ganon ![]()
Sub-Bosses
Stone Talus · Igneo Talus · Frost Talus · Molduga · Hinox · Blue Hinox · Black Hinox · Stalnox · Igneo Talus Titan · Molduking
Bosses
Colgera · Mucktorok · Marbled Gohma · Queen Gibdo · Phantom Ganon · Seized Construct · The Demon King's Army · Demon King Ganondorf · Demon Dragon ![]()
Sub-Bosses
Flame Gleeok · Frost Gleeok · Sludge Like · Thunder Gleeok · King Gleeok · Yunobo · Frox · Flux Construct · Moragia · Molduga · Hinox · Stalnox · Frost Talus · Igneo Talus · Stone Talus · Battle Talus · Stone Talus (Luminous) · Ganondorf · Master Kohga · Phantom Ganon
| |||||||||||||||||||||||