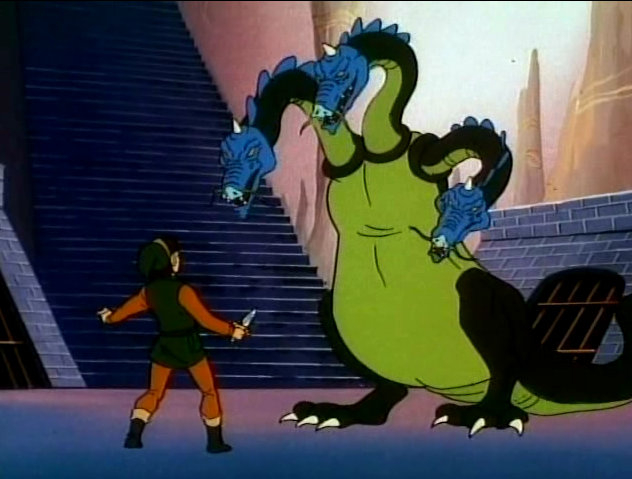
(→Dungeon Warping: Face Shrine info) |
m (Text replace - "File:GleeokLoZArt.png" to "File:LoZ Gleeok.png") |
||
| Line 1: | Line 1: | ||
| + | {{Boss |
||
| − | {{nominated}} |
||
| + | |name = Gleeok |
||
| − | '''Warping''' has been an ability of [[Link|Link's]] as early as ''[[The Legend of Zelda (Game)|The Legend of Zelda]]''. New additions to the series often bring newer methods of warping. In all cases, warping is the fastest mode of traveling across the land and sea. No physical or magical explanation has ever been offered for these mysterious portals and songs. One must simply assume "It's magic." And why not? Like all other aspects of ''The Legend of Zelda'' strewn together in a delicately executed manner- it ''is'' magic! |
||
| + | |image = [[File:Gleeok.png|300px]] |
||
| + | |caption = Gleeok artwork from ''Phantom Hourglass'' |
||
| + | |game = {{TLoZ}}<br>{{OoS}}<br>{{TMC}}<br>{{PH}} |
||
| + | |other = [[The Legend of Zelda (TV series)|Animated series]]<br>[[The Legend of Zelda (Comic)|''The Legend of Zelda'' comic]]<br>[[The Legend of Zelda: A Link to the Past (Comic)|''A Link to the Past'' comic]]<br>{{TFoE}}<br>{{TWoG}}<br>{{SSBB}} {{Exp|as a Sticker}} |
||
| + | |dungeon = [[Snake (Dungeon)|Snake]], [[Dragon (Dungeon)|Dragon]], and [[Lion (Dungeon)|Lion]] {{ExpGame|TLoZ}}<br>[[Moon (Dungeon)|Moon]], [[Lizard]], and [[Demon (Dungeon)|Demon]] {{ExpGame|TLoZ}} {{Exp|Second Quest}}<br>[[Explorer's Crypt]] {{ExpGame|OoS}}<br>[[Temple of Ice (Phantom Hourglass)|Temple of Ice]] {{ExpGame|PH}} |
||
| + | |weakness = [[Sword]]<br>[[Bomb]]s |
||
| + | }} |
||
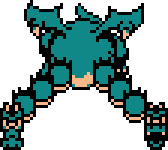
| + | '''Gleeok''' is a recurring [[boss]] in {{LZS|Series}}. It is a dragon with multiple heads, and if the heads are struck enough they detach and fight independently until the body is finally defeated. |
||
| + | {{TLoZManual|Gleeok|A huge dragon that has 2 to 4 heads and spits out beams at Link. Heads that Link cuts off from its body fly around in the air.}} |
||
| − | ==''The Legend of Zelda''== |
||
| − | Setting the mold for the future ''Legend of Zelda'' titles, its initial game introduced forms of warping that would be used and improved throughout later releases. The ''Other Warping'' section below lists more manners of warping that were born with this title. |
||
| − | [[Image:Recorder Sprite LoZ.gif|left]] |
||
| − | *A [[recorder]] will warp to any dungeon you have cleared. If you are facing north or west, you warp to the next dungeon. If you are facing south or east, you warp to the dungeon before the one you are at. Upon completing the [[Triforce]], Link can summon the whirlwind to warp to the ninth labyrinth.<ref>{{cite manual|quote=Well, once he's collected the last Trifrce fragment, Link can warp to the entrance to the ninth labyrinth by blowing the whistle and summoning the whirlwind.|game=The Legend of Zelda|page=26}}</ref> |
||
| + | ==Appearances== |
||
| − | After obtaining the [[Power Bracelet]] and the ability to push boulders around; Link can access certain stairwells that warp to others across Hyrule. The [[Old Man]] inside the cave offers 3 paths. The exit seems to be randomly determined regardless of which path is chosen inside the caves. |
||
| + | ===''The Legend of Zelda''=== |
||
| + | [[File:Gleeok2Headed.png|left|80px]] |
||
| + | Gleeok makes three appearances in {{TLoZ}}, all defeated in similar fashion. Using the Sword, [[Link]] must cut off each of the heads on the beast. Once a head is detached from the body, it will float around the room shooting fireballs at Link.<ref>{{Cite manual|quote= A huge dragon that has 2 to 4 heads and spits out beams at Link. Heads that Link cuts off from its body fly around in the air. |game= TLoZ|page= 38}}</ref> He must avoid the fireballs and cut off the other heads. |
||
| + | A two-headed version of the beast guards the fourth piece of Triforce in the {{c|Snake|Dungeon}}, a three-headed version is a mini-boss in the {{c|Dragon|Dungeon}}, and a four-headed version of the beast guards the piece of Triforce found in the {{c|Lion|Dungeon}}. In the [[Second Quest]], there is an two, three and four-headed versions guarding pieces of Triforce in the {{c|Moon|Dungeon}}, [[Lizard]] and {{c|Demon|Dungeon}}, respectively. |
||
| − | ==''BS The Legend of Zelda''== |
||
| − | [[Image:Flute Sprite LttP.gif|left]]An [[Ocarina]] located in the fourth level will warp you to any completed dungeon. When the Ocarina is played while facing west, it will warp you to the next dungeon. If played while facing east, it will return you to the previous dungeon. |
||
| + | ===''Oracle of Seasons''=== |
||
| − | *When the Ocarina is played on a pad near the east shore, the sixth dungeon will appear. |
||
| + | [[File:Oracle Of Seasons - Gleeok.png|left|105px]] |
||
| + | The Gleeok within the {{OoS}} is a two-headed version fought in the [[Explorer's Crypt]]. It is defeated in a different fashion from its former counterpart. Getting rid of the beast's heads is still Link's main objective, however, there is one more step before defeating it. Link must quickly slash away the heads. This must be done quickly, because the severed heads will reattach themselves to the body if given time. Once both heads are severed, the beast will start jumping, causing a massive earthquake in the arena. Using the [[Roc's Cape]] is the only way to avoid serious damage from the beast. When the beast is grounded Link should attack with the sword. He must continue this process until it is defeated. It will then give up the [[Seed of Life]], the seventh [[Essence of Nature]]. |
||
| − | =='' |
+ | ===''The Minish Cap''=== |
| + | {{Main|Gleerok}} |
||
| − | This innovative [[Super NES]] title rightfully returned ''warping'' to the ''Legend of Zelda'' series. The most noticeable expansion to warping is the comparison of ''Legend of Zelda's'' Recorder to the Ocarina. The Ocarina introduced here later served to be the inspiration for the most popular and highest rated title to the series. Newer forms of warping introduced would also serve to inspire [[Metroid Prime 2: Echoes]], specifically the Light World and Dark World concept. |
||
| + | Though Gleeok does not appear in {{TMC}}, the boss [[Gleerok]] is a one-headed Gleeok with a rock on its back.<ref>{{Cite|A Gleeok with a hard, rocky shell found in Mount Crenel.|Figurine description|TMC}}</ref> |
||
| − | [[Image:Magic Mirror Sprite LttP.gif|left]] |
||
| − | Within ''[[The Legend of Zelda: A Link to the Past|A Link to the Past]]'', there exist two different types of warping. In one instance, there exist portals that travel to the [[Dark World]]. These portals will send [[Link]] to the same coordinates within the Dark World; use of the [[Magic Mirror]] while within the Dark World will accomplish the same task, only in reverse, sending Link to the [[Light World]]. A patch of sparkling light will remain and permits Link to travel back to the same spot in the Dark World. A similiar patch will show up on the map screen as well.<ref>{{cite manual|quote=The place you used it last is marked on the Field Map.|game=A Link to the Past|page=27}}</ref> |
||
| + | ===''Phantom Hourglass''=== |
||
| − | The Magic Mirror also has an added advantage in that, unlike the portals which must be found, the Magic Mirror can be used anywhere. Within a dungeon, however, the Magic Mirror will merely send Link back to the entrance -- useful if ever he got stuck within the dungeon. |
||
| + | [[File:Gleeok Strategy PH 2.png|right|thumb|130px|Link fighting Gleeok]] |
||
| + | In {{PH}}, Gleeok appears as the ''Two-Headed Dragon'' Gleeok, boss of the {{c|Temple of Ice|ph}} and guardian of the [[Azurine]] steel. Its red head spews fireballs, while the blue head sprays frigid ice, similar to [[Trinexx]] from {{ALttP}}. |
||
| + | Link will be standing on a platform with four pegs near each corner. When one of the heads looses a blast at Link, he will need to attach the grappling hook to two pegs diagonally so as the rope launches the blast back at the other dragon's face, cracking its mask. In addition with these blasts, the two heads will lunge to snap the rope Link ties, while trying to bite him as well. They can also sink below the water to cause a tremor that will flood Link's platform, as well as cause chunks of ice to fall from the ceiling and crash into Link. Link can tie the grappling hook to two posts and walk along the rope to avoid the ice chunks. Three blasts to both heads will remove their masks. |
||
| − | The gateway of Hyrule Castle will also warp to the Dark World after overthrowing Agahnim.<ref>{{cite manual|quote=Once you have overthrown te wizard Agahnim, you can also enter the Dark World from the entrance of Hyrule Castle.|game=A Link to the Past|page=27}}</ref> |
||
| + | Both heads will remove two of the four pegs by snapping them with their jaws. Each head will take turns at trying to bite Link, then will charge up for a powered blast. The red dragon head will loose a fiery blast that will scorch him, as well as leave a trail of fire on the platform. The blue dragon head will loose a blast of ice that will freeze Link on contact. While charging, however, both dragons will be sucking in energy, exposing their tongues. Link can pull the head down by tying one end of the grappling hook to a post, and using it as an anchor on the dragon's head. Once down, Link must slash at the dragon head before it recovers. Repeating this process to both heads will defeat the dragon, and Link will obtain a [[Heart Container]], extra sands for the {{it|Phantom Hourglass}}, and the second of the three [[Pure Metal]]s, Azurine. |
||
| − | [[Image:Flute Sprite LttP.gif|left]] |
||
| − | A second method of warping is of a more traditional kind, utilizing a [[Flute]]. Blowing into the Flute will summon a bird that will carry Link to any one of eight landing points. |
||
| + | ==Non-Canon Appearances== |
||
| − | Swimming through whirlpools will warp to other whirlpools throughout Hyrule. The 6 whirlpool waterways can only be used after obtaining the [[Zora's Flippers]]. |
||
| + | {{noncanon|Start}} |
||
| + | ===Animated Series=== |
||
| + | [[File:Gleeok (Hitch in the Works).png|thumb|right|180px|Gleeok from the animated series]] |
||
| + | Gleeok appears in two episodes of the [[The Legend of Zelda (TV series)|animated series]]. In "[[Kiss'n Tell]]", [[Ganon]] sends a Gleeok and a [[Gibdo]] disguised as a beautiful maiden to a forest, where the Gleeok pretends to be attacking the maiden so that they can lure [[Link]] into the scene. However, [[Princess Zelda]] arrives instead and proceeds to try and fight off the Gleeok by throwing various kinds of fruits at the three-headed monster.<ref>{{cite episode|quote=And maybe an adventure. Link will be sorry he missed out. REAL sorry. Beautiful girls in trouble are what he LIVES for.|name=Princess Zelda|show=The Legend of Zelda|episode=4}}</ref><ref>{{cite episode|quote= Eat these lemons, sourpuss!|name=Princess Zelda|show=The Legend of Zelda|episode=4}}</ref> When the Gleeok is stunned for a moment, Zelda sees a chance to go but the maiden refuses, saying she wants to be rescued by a handsome hero.<ref>{{cite episode|quote=No! I want to be rescued by a handsome hero!|name=Maiden|show=The Legend of Zelda|episode=4}}</ref> Soon after, Link appears and battles against the Gleeok, who quickly [[zap]]s the two outer heads. With only one head left, Link grabs the Gleeok's tail, but the monster begins to run around in circles. Zelda, who was eating a banana from the fruit basket, throws the banana peel to the ground and causes the Gleeok to slip,<ref>{{cite episode|quote=Yeah, yeah, but let's get this over with.|name=Princess Zelda|show=The Legend of Zelda|episode=4}}</ref> allowing Link to deliver the final blow and send the Gleeok back to the [[Evil Jar]]. |
||
| + | In "[[Hitch in the Works]]", when Link arrives to the [[Underworld]] and tries to stop the wedding between Princess Zelda and Ganon, the evil wizard summons a [[Gleeok]] from the [[Evil Jar]] to attack Link.<ref>{{cite episode|quote=She's under my control, hero! And as for you, you have your own problems!|name=Ganon|show=The Legend of Zelda|episode=10}}</ref> Link fires three Sword Beams at the monster's necks, but the heads separate and come after him. He skillfully dodges their attacks, causing them to fly straight into Ganon, thus destroying the evil wizard and the remains of the Gleeok. |
||
| − | [[Image:Warp Tile.PNG|left|thumb|Active Warp Tile]] |
||
| − | The Warp tile introduced here offered a new twist to complicate dungeon mazes. Stepping on one warped Link to another room in the dungeon, often with choices of other warp tiles to go through. This seemingly simple innovation proved complex to navigate to progress. Inactive, greyed versions of the warp tile do not warp Link anyplace. They are where Link appears after warping. The warped-to tile will often be inactivated thus preventing Link from going back easily. |
||
| + | ===''The Legend of Zelda'' Comic=== |
||
| − | {{clear}} |
||
| + | A four-headed Gleeok appears in the ''[[Choices]]'' story of the [[The Legend of Zelda (Comic)|''Legend of Zelda'' comic]]. Link encounters it as he is traveling through the [[Underworld]] in search of Princess Zelda. Although Link at first seems to have trouble fighting the Gleeok,<ref>{{cite book|quote=Hey, a Gleeok is no problem! A four-headed Gleeok...that's something else!|book=The Legend of Zelda|publisher=Valiant Comics|page=5}}</ref> Link is able to cut off all four of the Gleeok's heads with a little help from [[Miff]]. The disembodied heads then begin to attack the young hero, but after some struggle, Link is able to defeat all of the Gleeok's heads.<ref>{{cite book|quote=Not bad, huh? Sometimes I amaze even myself!|book=The Legend of Zelda|publisher=Valiant Comics|page=7}}</ref> |
||
| − | ==''Link |
+ | ===''A Link to the Past'' Comic=== |
| + | [[File:Gleeok (comic).png|thumb|right|Gleeok from the ''A Link to the Past'' comic]] |
||
| − | [[Image:Crazytracy_colour.png|left|150]] |
||
| + | In the [[The Legend of Zelda: A Link to the Past (Comic)|''A Link to the Past'' comic]], Link is attacked by monsters called Gleeocs in the [[Palace of Darkness]]. However, the monsters are bright orange lizards with green gems on their heads, and thus physically resemble smaller versions of the [[Helmasaur King]] which is fought in the game. After Link is discovered wandering around the palace by a [[Rocklops]], he is attacked by a Gleeok that was called upon by the Rocklops. Although he defeats it easily with the [[Master Sword]], soon more [[Hinox]]s riding Gleeocs begin to head towards him.<ref>{{cite book|quote=Link!! There's more on the way!|book=A Link to the Past|publisher=Nintendo Power|page=12}}</ref> Link then gives [[Epheremelda]] a [[bomb]], which eventually denotes the [[firecorn]] stockpile and destroys the entire palace and, with it, the Gleeocs. |
||
| − | [[Image:Warp Point LA.gif|right]] |
||
| + | ===''Super Smash Bros. Brawl''=== |
||
| − | Warping on the relatively small [[Koholint Island]] was minimal but still functional for rapid travel. The warp pads in the dungeon's miniboss room and it's counterpart at the dungeon entrance, debuted with this title. |
||
| + | Gleeok appears as a [[Sticker]] in {{SSBB}}. |
||
| − | *Playing [[Manbo's Mambo]] will warp Link to Manbo's pond near [[Crazy Tracy|Crazy Tracy's]] home and potion shop. |
||
| − | **Manbo's Mambo will also warp to the dungeon entrance when played inside of dungeons. |
||
| + | {| class="wikitable" border="1" cellpadding="2" style="text-align:center;" |
||
| − | *A warp pad will appear at the entrance and in the mini-boss room once said mini-boss is defeated. Using the pad at the entrance will warp back to that room and vice versa. This is useful when leaving the dungeon and returning later. |
||
| + | |- |
||
| + | !width="inherited"|Name |
||
| + | !width="50px"|Image |
||
| + | !Artwork from |
||
| + | !Effect in [[The Subspace Emissary]] |
||
| + | !Usable by |
||
| + | |- |
||
| + | |[[Gleeok]] |
||
| + | |[[File:Gleeok Sticker.png|60px]] |
||
| + | |''The Legend of Zelda'' |
||
| + | |align=left|Launch Power +20 |
||
| + | |All |
||
| + | |} |
||
| + | ===CD-i Games=== |
||
| − | *Warp Holes can be found on elevated platforms at various points across the overworld. They can be used to warp Link to the next warp hole he has seen, in a specific sequence. |
||
| + | {{Sectstub}} |
||
| + | In {{TFoE}}, Gleeok appears as an enemy in [[Spearfish Falls]]. The dragon steals the fat lady's necklace, so Link must defeat it to recover it. It also appears as an enemy in {{TWoG}}. |
||
| + | {{noncanon|End}} |
||
| + | ==Trivia== |
||
| − | ==''Ocarina of Time''== |
||
| + | *In ''The Legend of Zelda'', there is an unused variant of Gleeok with one head within the game's code.<ref>[http://tcrf.net/The_Legend_of_Zelda#Unused_Enemy_Values The Legend of Zelda: Unused Enemy Values]</ref> |
||
| − | [[File:Ocarina of Time.png|left|50px]]The title of this game is the instrument used for warping, as well as the Key to open the Door of Time. The main new feature to using an instrument to warp is the use of multiple songs to get to a specific location. The feature thus far is unique to this title. This title also debuted the ability to warp through time as opposed to only warping through space. |
||
| + | *Gleeok is the only boss from ''The Legend of Zelda'' to not appear in {{BSTLoZ}}. |
||
| − | ''[[The Legend of Zelda: Ocarina of Time|Ocarina of Time]]'' featured more warping in the form of the [[Ocarina of Time (Item)|Ocarina of Time]]..<ref>{{cite manual|quote=With the Ocarina, you can also warp to other places.|game=The Legend of Zelda The Ocarina of Time|page=23}}</ref> |
||
| + | *The masks Gleeok wear in ''Phantom Hourglass'' are similar to that of the [[Helmaroc King]]. Without their masks they also bear a striking resemblance to [[Valoo]]. |
||
| − | |||
| + | *Being a multi-headed dragon, Gleeok bears similarities with the chthonic water beast of Greek mythology, {{wp|Lernaean Hydra|Hydra}}. |
||
| − | Link learns several songs such as the [[Minuet of Forest]] that warp him to a special pad in front of the song's corresponding [[temple]]; i.e. the [[Nocturne of Shadow]] will carry him to the [[Shadow Temple]], and so forth..<ref>{{cite manual|quote=Playing certain tunes can warp you to different places.|game=The Ocarina of Time|page=30}}</ref> |
||
| − | *[[Minuet of Forest]] - warps [[Link]] to the [[Lost Woods]]. |
||
| − | *[[Bolero of Fire]] - warps Link to the [[Death Mountain Crater]]. |
||
| − | *[[Serenade of Water]] - warps Link to [[Lake Hylia]]. |
||
| − | *[[Requiem of Spirit]] - warps Link to the [[Desert Colossus]]. |
||
| − | *[[Nocturne of Shadow]] - warps Link to the Kakariko [[Graveyard]]. |
||
| − | *[[Prelude of Light]] - warps Link to the [[Temple of Time]]. |
||
| − | *[[Scarecrow's Song]] - warps [[Pierre]] the scarecrow to a distant but close enough area for Link to [[Hookshot|Hookshot/Longshot]] onto him. |
||
| + | ==Gallery== |
||
| + | <gallery> |
||
| + | File:LoZ Gleeok.png|Gleeok artwork from ''The Legend of Zelda'' |
||
| + | File:GleeokHeadLoZ.png|Gleeok's Head artwork from ''The Legend of Zelda'' |
||
| + | File:GleeokBattleArtLoZ.png|Artwork of Link fighting Gleeok from ''The Legend of Zelda'' |
||
| + | File:Gleeok3Headed.png|Three Headed Gleeok from ''The Legend of Zelda'' |
||
| + | File:GleeokLoZ.png|Four Headed Gleeok from ''The Legend of Zelda'' |
||
| + | File:GleeokHead.png|Gleeok Head from ''The Legend of Zelda'' |
||
| + | File:Gleeok Masks.png|Gleeok in ''Phantom Hourglass'' |
||
| + | File:Gleeok NoMasks.png|Gleeok without masks in ''Phantom Hourglass'' |
||
| + | File:Gleeok2LoZArt.png|Gleeok Million Publishing guide artwork from ''The Legend of Zelda'' |
||
| + | File:Gleeok (Kiss'n Tell).png|Three-headed Gleeok from the animated series |
||
| + | File:Gleeok Heads (Hitch in the Works).png|Three Gleeok Heads from the animated series |
||
| + | File:Gleeok (VC).png|Four-headed Gleeok in ''The Legend of Zelda'' comic |
||
| + | File:Gleeok FoE.png|Gleeok from ''The Faces of Evil'' and ''The Wand of Gamelon'' |
||
| + | File:Gleeok Head WoG.png|Gleeok's Head from ''The Faces of Evil'' and ''The Wand of Gamelon'' |
||
| + | File:LoZLinkGleeok1988NintendoHasbro.jpg|Link fighting Gleeok action figure from ''The Legend of Zelda'' |
||
| + | </gallery> |
||
| + | {{Ref}} |
||
| − | [[Image:Farore's Wind 1.png|thumb|[[Farore's Wind]]]] |
||
| − | |||
| − | There is also a [[Spells of Ocarina of Time|spell]] that can be found known as [[Spells of Ocarina of Time#Farore's Wind|Farore's Wind]]. When used, it will place a "marker" at the door of the most recently traveled-through entrance. Upon being used again, it will carry Link back to that marker. This is a useful tool as it can also warp Link out of locked rooms and escaping from difficult enemies, such as the dungeon's boss or mini-boss. It can also be used to warp from one dungeon to another, if a warp point was set and Farore's Wind was later used. |
||
| − | |||
| − | [[image:Pedestaloftime.JPG|left]] Drawing the [[Master Sword]] from the [[Pedestal of Time]] will warp Link 7 years into the Future. Replacing the sword warps back 7 years. Link's age will change from a child to adult and vice versa in this warping system. This would be the first Time-warping used in ''The Legend of Zelda'' series. |
||
| − | {{clear}} |
||
| − | |||
| − | == ''Majora's Mask'' == |
||
| − | Due to the unusual nature of [[Saving]] in ''Majora's Mask'', the primary use for warping tends to be getting to a save point. The game may be saved once at any of the owl statues, which serve as warp destination points; as well as returning to the First Day. Although the Ocarina of Time returned, the warping function returned to having only one song and then selected a warp destination from a map. It did, however gain the ability to warp through time as well as space. |
||
| − | |||
| − | [[Image:Soaring.jpg|thumb|left|[[Song of Soaring]]]] [[Image:Time_warp.jpg|thumb|right|[[Zora Link]] Warping to 1st Day]] |
||
| − | *In ''[[The Legend of Zelda: Majora's Mask|Majora's Mask]]'', the [[Ocarina of Time (Item)|Ocarina of Time]] is once again used for warping. |
||
| − | Not long into the game, [[Link]] learns the [[Song of Soaring]], which can be used to take Link to any [[Owl Statue]] that he has marked with his sword.<ref>{{cite manual|quote=And when you play the Song of Soaring, which you will learn at some point in your quest, you will be able to warp to areas where there are Owl Statues.|game=Majora's Mask|page=40}}</ref> This is the only song you need for warping to specific locations, unlike in ''The Ocarina of Time'' where you had several songs. Once the song is played, Your map screen will appear showing an owl icon in the areas you have activated them. You simply selecte an area, and warp. |
||
| − | |||
| − | {{clear}} |
||
| − | |||
| − | * The complete set of warp locations are as follows: |
||
| − | **[[South Clock Town]] to the west side of the [[Clock Tower]] |
||
| − | **[[Milk Road]] near the fork in the road |
||
| − | **[[Southern Swamp]] outside of the [[Swamp Tourist Center]]. |
||
| − | **[[Woodfall]] on the shrine outside of the [[Woodfall Temple]] |
||
| − | **[[Mountain Village]] near the northern side of the map close to [[Don Gero]] |
||
| − | **[[Snowhead]] at the bottom of the path leading to the [[Snowhead Temple]] |
||
| − | **[[Great Bay Coast]] at the bottom of the ladders to the [[Marine Research Laboratory]] |
||
| − | **[[Zora Cape]] |
||
| − | **[[Ikana Canyon]], the upper part |
||
| − | **[[Stone Tower]]. |
||
| − | |||
| − | *The Ocarina of Time's other function returns Link to Clocktown, Dawn of the First Day when playing the [[Song of Time]]. This is the only form of Warping with a cost. All rupees and item stocks will be depleted upon returning to the First Day, although you can save rupees at the [[Banker]]. Once you talk to the [[Pierre]] at the bottom of the [[Observatory]], you learn two new variations of the [[Song of Time]]. These are The Inverted Song of Time, which slows time down by half, and The Song of Double, which skips forward half of a day. |
||
| − | |||
| − | *Furthermore, talking to [[Anju's Grandmother]] gives you further time traveling options. The Carnival of Time story she tells you will take you 2 hours forward, whilst the Carnival of Time skips you to the morning of the next day - regardless of what time it is. Note that you cannot chose the Carnival of Time story on the third day. |
||
| − | |||
| − | *There are also pads at the entrances of the four dungeons within the game. If Link has defeated the boss of that dungeon once before, Link will be have the option of warping right to the boss room and fighting the boss instantly. This can spare time instead of going through the troubles of the temple once again. |
||
| − | |||
| − | |||
| − | {{clear}} |
||
| − | |||
| − | ==''Oracle'' series== |
||
| − | [[Image:Harp.gif|left]] |
||
| − | [[Image:Galeseed.gif|right]] |
||
| − | *[[Gale Seeds]] have the ability to warp Link to any of the ''Mystical Trees''. As ammunition from the [[Seed Shooter]] or [[Slingshot]], Gale seeds will send common enemies away. |
||
| − | *The [[Harp of Ages]] warps Link through time. This works similiar to warping from the Dark World to the Light World in ''A Link to the Past'', via warping Link to the same map coordinates the item is used. |
||
| − | *The [[Tune of Echoes]] awakens warp portal tiles to travel to the opposite age. |
||
| − | *The [[Tune of Currents]] warps Link from the past to the present. |
||
| − | *The [[Tune of Ages]] allows Link to warp freely from one age to the opposite one. A sparkling pattern will remain to travel back where this tune is played. The marked spot will also appear on the Field Map. |
||
| − | *Hidden portals, in ''Oracle of Seasons'' will warp to [[Subrosia]]. The Subrosian portals return to Labrynna. |
||
| − | *In a linked game, a warp portal will appear near the Maku tree. This portal leads to an extra mini dungeon with very major Bosses. |
||
| − | |||
| − | ==''The Wind Waker''== |
||
| − | [[Image:Baton.png|left]] |
||
| − | ''[[The Legend of Zelda: The Wind Waker|The Wind Waker]]'' features more warping utilizing the game's titular item, the [[Wind Waker (Item)|Wind Waker]]. After obtaining the [[bow]], Link can face any of the larger cyclones and shoot [[Cyclos]], who is hiding within the cyclone. If three successful hits are achieved, Cyclos will submit to Link and teach him the [[Ballad of Gales]], which allows Link to harness the power of the cyclones and travel to one of several squares of the map, and is in fact the only way to get inside the [[Mother and Child Isles]]. |
||
| − | The different warping places are as follows: |
||
| − | * B7 - [[Outset Island]] [[Image:BoGlocations.PNG|right|150px]] |
||
| − | * D6 - [[Southern Fairy Island]] |
||
| − | * D2 - [[Windfall Island]] |
||
| − | * B2 - [[Mother and Child Isles]] |
||
| − | * F2 - [[Dragon Roost Island]] |
||
| − | * F6 - [[Forest Haven]] |
||
| − | * E4 - [[Tower of the Gods]] |
||
| − | * B4 - [[Greatfish Isle]] |
||
| − | * C3 - [[Tingle Island]] |
||
| − | |||
| − | Within many [[dungeon]]s there are also pots with fogs of various colors. These are known as [[Warp Jars]]. If both Jars of the same color are found within the same dungeon, jumping into one will take Link to the other. The cycle is green, blue, yellow. The yellow pot is usually right outside the [[boss]] room. If one of the pots is still covered, that pot is skipped in the cycle. |
||
| − | |||
| − | The [[Savage Labyrinth]] has Pillars of Light that serve as a warp spot. Warping back to the entrance is the only possibility. This dungeon doesn't allow Link to warp to any previously cleared areas. |
||
| − | |||
| − | ==''The Minish Cap''== |
||
| − | [[Image:Windcrest.PNG|left]][[Image:Windocarina.gif|left]] |
||
| − | ''[[The Legend of Zelda: The Minish Cap|The Minish Cap]]'' brings back the [[Flute]] warping system from ''[[The Legend of Zelda: A Link to the Past|A Link to the Past]]'' with the [[Ocarina of Wind]]. Finding and activating any of the many [[Wind Crest]]s around [[Hyrule]] will set it as a warp point. The Ocarina of Wind can be used once obtained to be carried away by Zeffa to any of the activated Wind Crests. |
||
| − | The different Wind Crest Locations are as follows: |
||
| − | *Hyrule [[Castle Town]] |
||
| − | *South [[Hyrule Field]] |
||
| − | *[[Minish Woods]] |
||
| − | *[[Mount Crenel]] |
||
| − | *[[Lake Hylia]] |
||
| − | *[[Castor Wilds]] |
||
| − | *[[Cloud Tops]] |
||
| − | |||
| − | |||
| − | Other, different warp pads also appear within dungeons, similarly to the [[Game Boy]] and [[Game Boy Color]] ''[[The Legend of Zelda (Series)|The Legend of Zelda]]'' games of past. A blue warp pad will appear at the entrance and in the [[:Category:Mini-Bosses|mini-boss]] room once said mini-boss is defeated. Using the newly found warp tile will activate it's counterpart near the entrance to the dungeon. Once both are activated warping will be unrestricted between the two. A red pad will appear at the entrance and in the room right before the dungeon's [[:Category:Bosses|boss]]. As with the blue one, using it causes it's counterpart to appear near the entrance; thusly allowing free travel between the two. Useful to prepare for a boss fight and return close enough to retain [[Health]] and stocked inventories. |
||
| − | |||
| − | |||
| − | After fusing Kinstones with the member of the [[Wind Tribe]] found in [[Hyrule Castle Town]] a warp pedestal will appear just North of Link's house. This warp portal leads to the Wind Tribe's [[Tower of Winds|tower]] in the [[Cloud Tops]]. |
||
| − | |||
| − | ==''Twilight Princess''== |
||
| − | The largest overworld of the ''Legend of Zelda'' series would be expected to employ a powerful Warping System. Twilight Princess delivers via use of Midna and a function to warp otherwise immovable objects far across the Hylian landscape. |
||
| − | |||
| − | [[Image:Portal (Blue).jpg|thumb|right|136px|[[Portal]]]] |
||
| − | [[Image:WolfWarp.jpg|thumb|right|[[Wolf Link]] warping using the power of [[Twilight]]]] |
||
| − | *In ''[[The Legend of Zelda: Twilight Princess|Twilight Princess]]'', [[Shadow Beasts]] dot the landscapes of [[Hyrule]]. Defeating each of the groups of Shadow Beasts will create a [[portal]] near their location, which [[Midna]] can then utilize to warp [[Link]] and herself across Hyrule. Very large objects can be transported in this manner. |
||
| − | |||
| − | * The complete set of warp locations are as follows: |
||
| − | ** [[Ordon Spring]] |
||
| − | ** Southern [[Faron Woods]] |
||
| − | ** Northern Faron Woods |
||
| − | ** [[Sacred Grove]] |
||
| − | ** [[Kakariko Village]] |
||
| − | ** [[Kakariko Gorge]] |
||
| − | ** [[Death Mountain]] |
||
| − | ** [[Bridge of Eldin]] |
||
| − | ** [[Zora's Domain]] |
||
| − | ** [[Upper Zora's River]] |
||
| − | ** [[Castle Town]] (Outside) |
||
| − | ** [[Lake Hylia]] |
||
| − | ** [[Gerudo Mesa]] |
||
| − | ** [[Mirror Chamber]] |
||
| − | ** [[Snowpeak Mountain]] |
||
| − | |||
| − | [[Image:Ooccoo.png|right|130px]] |
||
| − | * [[Ooccoo]] and [[Ooccoo Jr.]] are characters in Twilight Princess, however they can be obtained as a temporary item if found. They can warp Link out of the dungeon, and return later to the room that he warped from. This item works very much in the same fashion as the [[Warp Jars]] found in ''The Wind Waker''. Ooccoo is removed from your inventory upon completion of the temple you found it in. |
||
| − | |||
| − | * The [[Great Fairy]] offers to warp Link back to the [[Cave of Ordeals]] entrance or to any of the Fountains in which she has sent fairies to. This power is not unexpected from such a magically powerful persona. |
||
| − | |||
| − | * When in a [[Cave|dig cavern]], the player can climb onto a rock when a beam of light shines. The player then appears above ground. |
||
| − | |||
| − | {{clear}} |
||
| − | |||
| − | ==''Phantom Hourglass''== |
||
| − | |||
| − | [[Image:BlueWarpPortal.gif|left|thumb|Link stepping into a portal.|150px]] |
||
| − | * The many temples in ''Phantom Hourglass'' each have their own blue portal. Once you reach the room preceding the boss, you can read a tablet which reveals the portal. Stepping into this lets Link warp back to the first room of the temple. |
||
| − | |||
| − | * The [[Temple of the Ocean King]] employs a unique warp system due to it's clock based nature. Throughout the temple, there are blue warp portals (much like in other temples without the ability to return), which are usually located near chests containing pieces of the [[Sea Chart]]. However, once you reach a certain point in the temple, you gain access to the golden portal. Stepping into this sends Link back to the entrance, much like the blue counterparts, only it saves the time you used to reach it. This means Link can use the portal to skip half way through the temple, at the cost of taking away the time originally used to get to said point. |
||
| − | |||
| − | {{clear}} |
||
| − | |||
| − | [[Image:Cyclone Slate.png|left]][[Image:ser.jpg|right|thumb|The six warping symbols.|150px]] |
||
| − | [[Image:GoldenFrogs.gif|thumb|[[Golden Frog]]|150px]][[Image:Goldenfroglocations.gif|right|200px]] |
||
| − | *''[[The Legend of Zelda: Phantom Hourglass|Phantom Hourglass]]'' features a system of warping similar to ''[[The Legend of Zelda: The Wind Waker|The Wind Waker]]'', although instead of using The Wind Waker to summon cyclones, [[Link]] uses a [[Cyclone Slate]] obtained from the [[Golden Chief Cylos]] of [[Uncharted Island]]. There are a total of six symbols which can be drawn, and are each learned from [[Golden Frog]]s shot down by your cannon throughout the seas. |
||
| − | |||
| − | The Great Sea map features the ability to notate the symbols at their respective warp points. Drawing a symbol on the slate will take Link to the location of the frog that taught him that symbol. The symbols must be drawn in one stroke without the stylus mistouching the screen. However simple it may be, random failure can be expected. |
||
| − | |||
| − | |||
| − | The complete list of Golden Frog locations are as follows: |
||
| − | |||
| − | * Southwestern Sea |
||
| − | ** Midway between [[Mercay Island]] and [[Isle of Ember]]. |
||
| − | ** North-northwest of [[Molida Island]]. |
||
| − | * Northwestern Sea |
||
| − | ** Southwest from the port of [[Bannan Island]]. |
||
| − | * Southeastern Sea |
||
| − | ** North-northwest of [[Dee Ess Island]]. |
||
| − | ** West-northwest of [[Isle of Frost]]. |
||
| − | * Northeastern Sea |
||
| − | ** Outside of both rock circles, north-northwest of the first of the bottom three small sea stones. |
||
| − | {{clear}} |
||
| − | |||
| − | ==Other Warping== |
||
| − | [[Image:Wallmaster1.jpg|right]] |
||
| − | ===Enchanted Areas=== |
||
| − | *The wrong direction in many ''enchanted'' areas will warp Link back to the entrance, unless he knows the specific directions or the trick to get through. |
||
| − | **[[Lost Woods]] (''[[The Legend of Zelda (Game)|The Legend of Zelda]]'', ''[[The Legend of Zelda: Ocarina of Time|Ocarina of Time]]'', ''[[The Legend of Zelda: Oracle of Seasons|Oracle of Seasons]]'') |
||
| − | **[[Death Mountain]] (''[[The Legend of Zelda (Game)|The Legend of Zelda]]'') -a nearby fortune teller sells the directions |
||
| − | **[[Haunted Wasteland]] (''[[The Legend of Zelda: Ocarina of Time|Ocarina of Time]]'') - Use the [[Lens of Truth]] to follow the spirit guide. |
||
| − | **[[Ganon's Tower]] (''[[The Legend of Zelda: The Wind Waker|The Wind Waker]]'') - Follow [[Phantom Ganon|Phantom Ganon's]] sword hilt to the [[Light Arrow]]s |
||
| − | **[[Woods of Mystery]] (''[[The Legend of Zelda: Majora's Mask|Majora's Mask]]'') - Follow a monkey to find [[Twinrova|Koume]] |
||
| − | **[[Pinnacle Rock]] (''[[The Legend of Zelda: Majora's Mask|Majora's Mask]]'') - Follow the [[seahorse]] after retrieving it from the [[Fisherman]] at [[Great Bay]] |
||
| − | **[[Snowhead]] Base (''[[The Legend of Zelda: Twilight Princess|Twilight Princess]]'') - Follow the [[Reekfish]] Scent as [[Wolf Link]]. |
||
| − | **[[Royal Valley]] woods (''[[The Legend of Zelda: The Minish Cap|The Minish Cap]]'') - Read the signs |
||
| − | **The Phantom Hallway on [[Isle of the Dead]] (''[[The Legend of Zelda: Phantom Hourglass|Phantom Hourglass]]'') - Learn the correct path from the [[Sage]]s |
||
| − | **The final dungeon of a linked [[Oracle series|''Oracle'' series]] game has rooms with statues rolling their eyes. The eyes will not look in the direction one must travel. |
||
| − | **[[Wind Fish's Egg]] (''[[The Legend of Zelda: Link's Awakening|Link's Awakening]]'') - Another seemingly endless maze. Specific directions must be found in the library. |
||
| − | **Chasing the [[Ghost Ship]]- Restore [[Ciela]]'s memory and all 3 fairies will blink when the Ghost ship is near |
||
| − | |||
| − | ===Dungeon Warping=== |
||
| − | *Dungeon Warp Tiles. Serving as an interactive maze in many dungeons, this tiles test a hero's mental powers. Hera's Tower prominently features warp tiles. Note: This is similar to the miniboss and Boss room warping tiles. The difference is that the exit points and entrance points are often in rooms with no further way out. |
||
| − | *Often after slaying a dungeon boss, Link will be warped outside. |
||
| − | *[[Wallmaster]]s and [[Floormaster]]s. Being grabbed by one is much like warping back to the entrance. This is rarely used by a player's own free will. |
||
| − | *Usually when you fall down a pitfall, you will be warped to a nearby location. |
||
| − | *In ''Link's Awakening's'' [[Face Shrine]], the room past [[Smasher]] has a Northern door that, when entered, warps Link to a similar room further South of the dungeon. |
||
| − | |||
| − | ===Overworld and Miscellaneous Warping=== |
||
| − | *[[Cyclos]]-Defeat Cyclos with the [[bow|arrows]] for him to calm down and his whirlwinds will no longer warp [[King of Red Lions|Korl]] and [[Link]] far away. |
||
| − | *[[Big Octo]]-If you have yet to receive [[bomb]]s from the pirates, or if you are too slow to defeat one, a [[Big Octo]] will warp [[Link]] and the [[King of Red Lions]] far away. |
||
| − | *In [[Stealth Missions|stealth missions]], if you get caught by a guard, you will be ''warped'' to a different location. |
||
| − | *Getting a ''Game Over'' as well as Saving and restarting the game will warp you to a certain place in the game. |
||
| − | |||
| − | ==Trivia== |
||
| − | ''[[Zelda II: The Adventure of Link|The Adventure of Link]]'' features absolutely no form of warping, thus adding to its outsider status from other ''The Legend of Zelda'' titles. |
||
| + | {{Names |
||
| − | In ''[[The Legend of Zelda: The Minish Cap|The Minish Cap]]'', the tune that is played on the Ocarina is the same tune that is played when using the Warp Flute in Super Mario Bros. 3. |
||
| + | |en= |
||
| + | |enM= |
||
| + | |ja= {{Japanese|グリオーク|Guriōku}} {{ExpGame|TLoZ}}<br>{{Japanese|氷炎双頭竜 グリオーク|Hyō-En Sōtō Ryū Guriōku}} {{ExpGame|PH}} |
||
| + | |jaM= Gleeok<br>Ice-Fire Two-Headed Dragon: Gleeok |
||
| + | |esL= Gleeok {{ExpGame|TLoZ}}<br>Gleeok, Dragón Bicéfalo {{ExpGame|PH}} |
||
| + | |esLM= -<br>Gleeok, Two-Headed Dragon |
||
| + | |esS= Griock |
||
| + | |esSM= - |
||
| + | |frC= Gleeok, Dragon Bicéphale {{ExpGame|PH}} |
||
| + | |frCM= Gleeok, Two-Headed Dragon |
||
| + | |frF= Griock |
||
| + | |frFM= - |
||
| + | |de= {{de|Gleeok}} {{ExpGame|TLoZ}}<br>{{de|Griock|Griock, zweiköpfiger Drache}} {{ExpGame|PH}} |
||
| + | |deM= Gleeok<br>Griock, Two-Headed Dragon |
||
| + | |it= Griock {{ExpGame|SSBB}}<br>Griock, dragone a due teste {{ExpGame|PH}}<br>Gleook {{Exp|In the animated series}} |
||
| + | |itM= -<br>Griock, two-headed dragon<br>- |
||
| + | |pt= |
||
| + | |ptM= |
||
| + | |ptP= |
||
| + | |ptPM= |
||
| + | |ptB= |
||
| + | |ptBM= |
||
| + | |nl= |
||
| + | |nlM= |
||
| + | |ru= |
||
| + | |ruM= |
||
| + | |ko= {{Korean|그리오크|Geuriokeu}}<br>{{Korean|빙염쌍두룡 그리오크|Bingyeom Ssangduryong Geuriokeu}} {{ExpGame|PH}} |
||
| + | |koM= Gleeok<br>Two-headed Dragon of Ice and Flame: Gleeok |
||
| + | |ch= |
||
| + | |chM= |
||
| + | |chT= |
||
| + | |chTM= |
||
| + | |chS= |
||
| + | |chSM= |
||
| + | }} |
||
| + | {{Bosses|PH}} |
||
| − | ==References== |
||
| + | {{SaurianEnemy}} |
||
| − | <div class="references-small"> |
||
| + | {{FireEnemy}} |
||
| − | <references/> |
||
| − | </div> |
||
| − | [[Category: |
+ | [[Category:Bosses]] |
| + | [[Category:Dragons]] |
||
| + | [[Category:Bosses in Phantom Hourglass]] |
||
| + | [[Category:Enemies in Link: The Faces of Evil]] |
||
| + | [[Category:Enemies in Zelda: The Wand of Gamelon]] |
||
| + | [[Category:Enemies in the Zelda animated series]] |
||
Revision as of 04:45, 31 October 2015
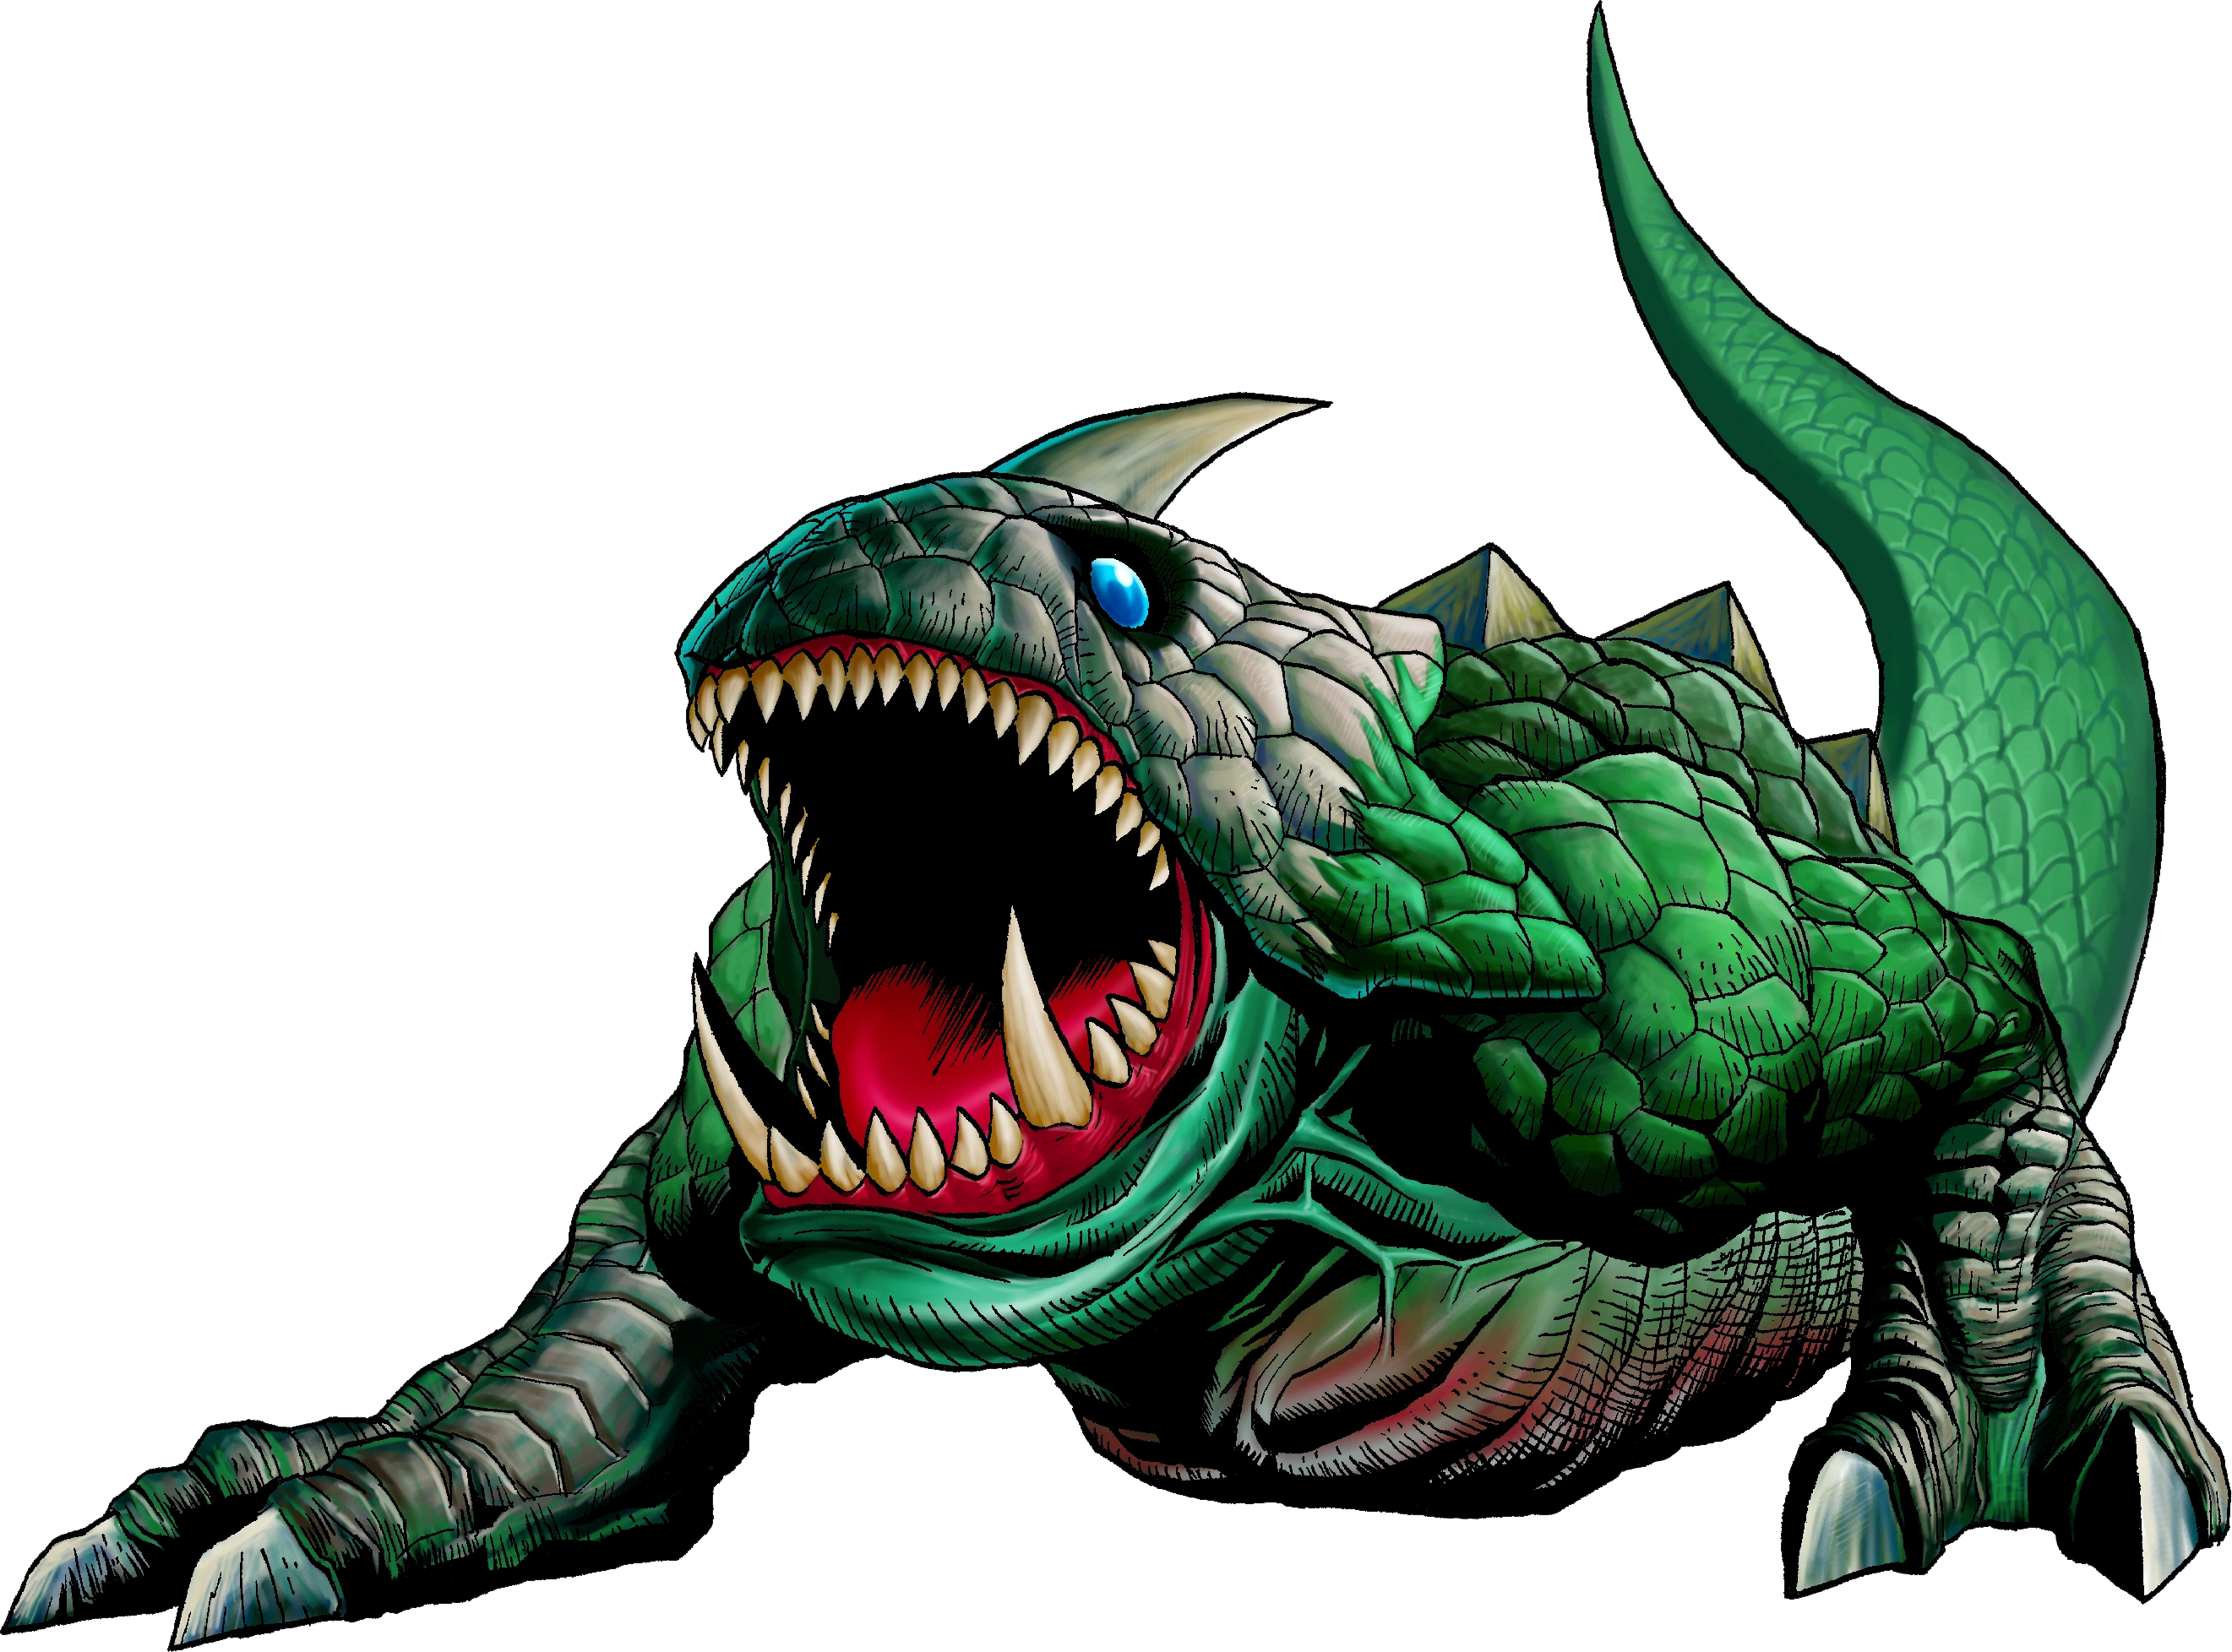
Template:Boss Gleeok is a recurring boss in Template:LZS. It is a dragon with multiple heads, and if the heads are struck enough they detach and fight independently until the body is finally defeated.
Template:TLoZManual
Appearances
The Legend of Zelda
Gleeok makes three appearances in The Legend of Zelda, all defeated in similar fashion. Using the Sword, Link must cut off each of the heads on the beast. Once a head is detached from the body, it will float around the room shooting fireballs at Link.[1] He must avoid the fireballs and cut off the other heads.
A two-headed version of the beast guards the fourth piece of Triforce in the Template:C, a three-headed version is a mini-boss in the Template:C, and a four-headed version of the beast guards the piece of Triforce found in the Template:C. In the Second Quest, there is an two, three and four-headed versions guarding pieces of Triforce in the Template:C, Lizard and Template:C, respectively.
Oracle of Seasons
The Gleeok within the Oracle of Seasons is a two-headed version fought in the Explorer's Crypt. It is defeated in a different fashion from its former counterpart. Getting rid of the beast's heads is still Link's main objective, however, there is one more step before defeating it. Link must quickly slash away the heads. This must be done quickly, because the severed heads will reattach themselves to the body if given time. Once both heads are severed, the beast will start jumping, causing a massive earthquake in the arena. Using the Roc's Cape is the only way to avoid serious damage from the beast. When the beast is grounded Link should attack with the sword. He must continue this process until it is defeated. It will then give up the Seed of Life, the seventh Essence of Nature.
The Minish Cap
Though Gleeok does not appear in The Minish Cap, the boss Gleerok is a one-headed Gleeok with a rock on its back.[2]
Phantom Hourglass
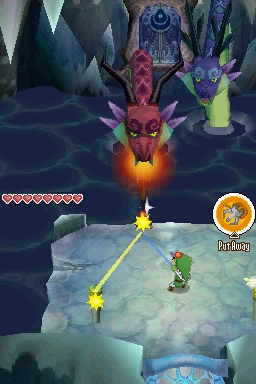

Link fighting Gleeok
In Phantom Hourglass, Gleeok appears as the Two-Headed Dragon Gleeok, boss of the Template:C and guardian of the Azurine steel. Its red head spews fireballs, while the blue head sprays frigid ice, similar to Trinexx from A Link to the Past.
Link will be standing on a platform with four pegs near each corner. When one of the heads looses a blast at Link, he will need to attach the grappling hook to two pegs diagonally so as the rope launches the blast back at the other dragon's face, cracking its mask. In addition with these blasts, the two heads will lunge to snap the rope Link ties, while trying to bite him as well. They can also sink below the water to cause a tremor that will flood Link's platform, as well as cause chunks of ice to fall from the ceiling and crash into Link. Link can tie the grappling hook to two posts and walk along the rope to avoid the ice chunks. Three blasts to both heads will remove their masks.
Both heads will remove two of the four pegs by snapping them with their jaws. Each head will take turns at trying to bite Link, then will charge up for a powered blast. The red dragon head will loose a fiery blast that will scorch him, as well as leave a trail of fire on the platform. The blue dragon head will loose a blast of ice that will freeze Link on contact. While charging, however, both dragons will be sucking in energy, exposing their tongues. Link can pull the head down by tying one end of the grappling hook to a post, and using it as an anchor on the dragon's head. Once down, Link must slash at the dragon head before it recovers. Repeating this process to both heads will defeat the dragon, and Link will obtain a Heart Container, extra sands for the Template:It, and the second of the three Pure Metals, Azurine.
Non-Canon Appearances
Animated Series

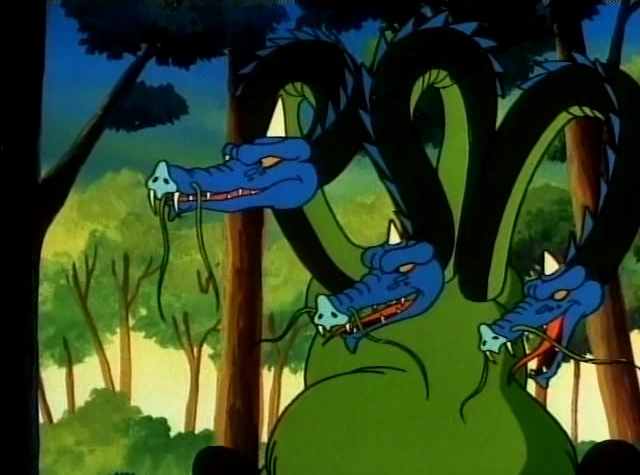
Gleeok from the animated series
Gleeok appears in two episodes of the animated series. In "Kiss'n Tell", Ganon sends a Gleeok and a Gibdo disguised as a beautiful maiden to a forest, where the Gleeok pretends to be attacking the maiden so that they can lure Link into the scene. However, Princess Zelda arrives instead and proceeds to try and fight off the Gleeok by throwing various kinds of fruits at the three-headed monster.[3][4] When the Gleeok is stunned for a moment, Zelda sees a chance to go but the maiden refuses, saying she wants to be rescued by a handsome hero.[5] Soon after, Link appears and battles against the Gleeok, who quickly zaps the two outer heads. With only one head left, Link grabs the Gleeok's tail, but the monster begins to run around in circles. Zelda, who was eating a banana from the fruit basket, throws the banana peel to the ground and causes the Gleeok to slip,[6] allowing Link to deliver the final blow and send the Gleeok back to the Evil Jar.
In "Hitch in the Works", when Link arrives to the Underworld and tries to stop the wedding between Princess Zelda and Ganon, the evil wizard summons a Gleeok from the Evil Jar to attack Link.[7] Link fires three Sword Beams at the monster's necks, but the heads separate and come after him. He skillfully dodges their attacks, causing them to fly straight into Ganon, thus destroying the evil wizard and the remains of the Gleeok.
The Legend of Zelda Comic
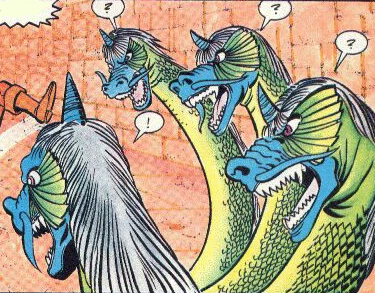
A four-headed Gleeok appears in the Choices story of the Legend of Zelda comic. Link encounters it as he is traveling through the Underworld in search of Princess Zelda. Although Link at first seems to have trouble fighting the Gleeok,[8] Link is able to cut off all four of the Gleeok's heads with a little help from Miff. The disembodied heads then begin to attack the young hero, but after some struggle, Link is able to defeat all of the Gleeok's heads.[9]
A Link to the Past Comic


Gleeok from the A Link to the Past comic
In the A Link to the Past comic, Link is attacked by monsters called Gleeocs in the Palace of Darkness. However, the monsters are bright orange lizards with green gems on their heads, and thus physically resemble smaller versions of the Helmasaur King which is fought in the game. After Link is discovered wandering around the palace by a Rocklops, he is attacked by a Gleeok that was called upon by the Rocklops. Although he defeats it easily with the Master Sword, soon more Hinoxs riding Gleeocs begin to head towards him.[10] Link then gives Epheremelda a bomb, which eventually denotes the firecorn stockpile and destroys the entire palace and, with it, the Gleeocs.
Super Smash Bros. Brawl
Gleeok appears as a Sticker in Super Smash Bros. Brawl.
| Name | Image | Artwork from | Effect in The Subspace Emissary | Usable by |
|---|---|---|---|---|
| Gleeok | File:Gleeok Sticker.png | The Legend of Zelda | Launch Power +20 | All |
CD-i Games
Template:Sectstub In The Faces of Evil, Gleeok appears as an enemy in Spearfish Falls. The dragon steals the fat lady's necklace, so Link must defeat it to recover it. It also appears as an enemy in The Wand of Gamelon.
Trivia
- In The Legend of Zelda, there is an unused variant of Gleeok with one head within the game's code.[11]
- Gleeok is the only boss from The Legend of Zelda to not appear in BS The Legend of Zelda.
- The masks Gleeok wear in Phantom Hourglass are similar to that of the Helmaroc King. Without their masks they also bear a striking resemblance to Valoo.
- Being a multi-headed dragon, Gleeok bears similarities with the chthonic water beast of Greek mythology, Hydra.
Gallery
- LoZ Gleeok.png
Gleeok artwork from The Legend of Zelda
- GleeokHeadLoZ.png
Gleeok's Head artwork from The Legend of Zelda
- GleeokBattleArtLoZ.png
Artwork of Link fighting Gleeok from The Legend of Zelda
- Gleeok3Headed.png
Three Headed Gleeok from The Legend of Zelda
- GleeokLoZ.png
Four Headed Gleeok from The Legend of Zelda
- GleeokHead.png
Gleeok Head from The Legend of Zelda

Gleeok in Phantom Hourglass
Gleeok without masks in Phantom Hourglass
- Gleeok2LoZArt.png
Gleeok Million Publishing guide artwork from The Legend of Zelda

Three-headed Gleeok from the animated series

Three Gleeok Heads from the animated series
Four-headed Gleeok in The Legend of Zelda comic
- Gleeok FoE.png
Gleeok from The Faces of Evil and The Wand of Gamelon
- Gleeok Head WoG.png
Gleeok's Head from The Faces of Evil and The Wand of Gamelon
- LoZLinkGleeok1988NintendoHasbro.jpg
Link fighting Gleeok action figure from The Legend of Zelda

References
- ↑ "A huge dragon that has 2 to 4 heads and spits out beams at Link. Heads that Link cuts off from its body fly around in the air." (The Legend of Zelda manual, pg. 38)
- ↑ "A Gleeok with a hard, rocky shell found in Mount Crenel." — Figurine description (The Minish Cap)
- ↑ Template:Cite episode
- ↑ Template:Cite episode
- ↑ Template:Cite episode
- ↑ Template:Cite episode
- ↑ Template:Cite episode
- ↑ Template:Cite book
- ↑ Template:Cite book
- ↑ Template:Cite book
- ↑ The Legend of Zelda: Unused Enemy Values
| Language | Name | Meaning | |
|---|---|---|---|
| Japanese | Template:Japanese Template:ExpGame Template:Japanese Template:ExpGame |
Gleeok Ice-Fire Two-Headed Dragon: Gleeok | |
| FrenchCA | Gleeok, Dragon Bicéphale Template:ExpGame | Gleeok, Two-Headed Dragon | |
| FrenchEU | Griock | - | |
| German | Gleeok Template:ExpGame Griock, zweiköpfiger Drache Template:ExpGame |
Gleeok Griock, Two-Headed Dragon | |
| Italian | Griock Template:ExpGame Griock, dragone a due teste Template:ExpGame Gleook |
- Griock, two-headed dragon - | |
| Korean | Template:Korean Template:Korean Template:ExpGame |
Gleeok Two-headed Dragon of Ice and Flame: Gleeok | |
| SpanishEU | Griock | - | |
| SpanishLA | Gleeok Template:ExpGame Gleeok, Dragón Bicéfalo Template:ExpGame |
- Gleeok, Two-Headed Dragon | |
Mazura · Jermafenser · Rebonack · Carock · Gooma · Barba · Thunderbird ![]() · Link's Shadow
· Link's Shadow
Light World
Ball and Chain Trooper ![]() · Six Armos Knights · Lanmola Trio · Moldorm · Agahnim
· Six Armos Knights · Lanmola Trio · Moldorm · Agahnim ![]()
Dark World
Helmasaur King · Arrghus · Mothula · Blind the Thief · Kholdstare · Vitreous · Trinexx · Ganon
Super Helmasaur · Super Arrghus · Super Mothula · Super Blind · Dark Links![]()
Bosses
Moldorm · Genie · Slime Eye · Angler Fish (2D) · Slime Eel · Facade · Evil Eagle (2D) · Hot Head · Shadow Nightmares
Guardians
Rolling Bones ![]() · King Moblin
· King Moblin ![]() · Hinox
· Hinox ![]() · Dodongo Snakes x2
· Dodongo Snakes x2 ![]() · Lanmola
· Lanmola ![]() · Cue Ball
· Cue Ball ![]() · Master Stalfos x4 · Gohma Twins · Armos Knight
· Master Stalfos x4 · Gohma Twins · Armos Knight ![]() · Smasher
· Smasher ![]() · Grim Creeper · Turtle Rock · Blaino
· Grim Creeper · Turtle Rock · Blaino
Bosses
Gohma · King Dodongo · Barinade · Phantom Ganon · Volvagia · Morpha · Bongo Bongo · Twinrova · Ganondorf · Ganon
Middle Bosses
Lizalfos · Big Octo · Stalfos · Meg · Flare Dancer · White Wolfos · Dark Link · Dead Hand · Gerudo Thief · Iron Knuckle · Dynalfos
Bosses
Odolwa · Goht · Gyorg · Twinmold · Majora ![]()
Middle Bosses
Dinolfos · Gekko · Wizzrobe · Gerudo Pirate · Wart · Gekko and Mad Jelly
Captain Keeta · Iron Knuckle · Sharp · Igos du Ikana · Garo Master · Gomess · Eyegore
Bosses
Aquamentus · Dodongo · Mothula · Gohma · Digdogger · Manhandla · Gleeok · Medusa Head · General Onox ![]()
Sub-Bosses
Brother Goriyas · Facade ![]() · Omuai · Agunima · Great Moblin
· Omuai · Agunima · Great Moblin ![]() · Syger · Vire
· Syger · Vire ![]() · Poe Sisters · Frypolar
· Poe Sisters · Frypolar
Bosses
Pumpkin Head · Head Thwomp (2D) · Shadow Hag · Eyesoar · Smog · Octogon · Possessed Nayru · Plasmarine · Ramrock · Veran ![]()
Sub-Bosses
Giant Ghini · Swoop · Subterror · Armos Warrior · Great Moblin ![]() · Smasher · Vire
· Smasher · Vire ![]() · Angler Fish (2D) · Blue Stalfos
· Angler Fish (2D) · Blue Stalfos
Bosses
Gohma · Kalle Demos · Gohdan · Helmaroc King · Jalhalla · Molgera · Puppet Ganon ![]() · Ganondorf
· Ganondorf
Minibosses
Green Bokoblin · Moblin · Mothula · Darknut · Cyclos · Phantom Ganon · Stalfos · Wizzrobe · Mighty Darknut · Big Octo![]()
Bosses
Phantom Ganon ![]() · Stone Arrghus · Helmaroc King · Big Poe · Big Moldorm x2 · Frostare · Vaati · Ganon
· Stone Arrghus · Helmaroc King · Big Poe · Big Moldorm x2 · Frostare · Vaati · Ganon
Sub-Bosses
Chief Soldier · Shadow Link ![]() · Manhandla · Dodongos · Big Dark Stalfos · Gohma · Big Dodongo
· Manhandla · Dodongos · Big Dark Stalfos · Gohma · Big Dodongo
Bosses
Big Green Chuchu ![]() · Gleerok · Mazaal · Big Octorok
· Gleerok · Mazaal · Big Octorok ![]() · Gyorg Pair · Vaati
· Gyorg Pair · Vaati ![]()
Sub-Bosses
Madderpillar ![]() · Dark Nut · Big Blue Chuchu
· Dark Nut · Big Blue Chuchu ![]() · Red Dark Nut · Black Knight
· Red Dark Nut · Black Knight
Bosses
Diababa · Fyrus · Morpheel · Stallord · Blizzeta · Armogohma · Argorok · Zant · Puppet Zelda · Ganon · Ganondorf ![]()
Sub-Bosses
Ook · King Bulblin · Dangoro · Twilit Carrier Kargarok · Twilit Bloat · Deku Toad · Death Sword · Darkhammer · Darknut · Aeralfos · Phantom Zant
Bosses
Stagnox · Fraaz · Phytops · Cragma · Byrne · Skeldritch · Demon Train · Chancellor Cole · Malladus
Stagnox II · Fraaz II · Phytops II · Cragma II · Skeldritch II · Dark Link![]()
Sub-Bosses
Mothula · Geozard · Rocktite · Ice Keese · Freezard · White Wolfos · Geozard Chief · Big Blin ![]() · Snapper · Helmet Chuchu · Metal Chuchu · Stalfos · Heatoise · Stalfos Warrior · Gerune · Ergtorok ·
· Snapper · Helmet Chuchu · Metal Chuchu · Stalfos · Heatoise · Stalfos Warrior · Gerune · Ergtorok ·
Bosses
Ghirahim ![]() · Scaldera · Moldarach · The Imprisoned
· Scaldera · Moldarach · The Imprisoned ![]() · Koloktos · Tentalus · Levias
· Koloktos · Tentalus · Levias ![]() · Bilocyte
· Bilocyte ![]() · Demise
· Demise
Sub-Bosses
Stalfos · Lizalfos · Stalmaster · Moldarach · LD-002G Scervo · Dark Lizalfos · Magmanos · Moldorm · Dreadfuse
Bosses
Yuga ![]() · Moldorm · Margomill · Gemesaur King · Arrghus · Knucklemaster · Stalblind · Zaganaga · Dharkstare · Grinexx · Yuga Ganon
· Moldorm · Margomill · Gemesaur King · Arrghus · Knucklemaster · Stalblind · Zaganaga · Dharkstare · Grinexx · Yuga Ganon
Sub-Bosses
Armos · Red Stalfos · Heedles · Green & Red Goriyas · Gigabari · Gibdos & Purple Mini-Moldorms · Red Eyegores · Flying Tiles & Devalants · Big Pengator & Pengators · Fire Gimos · Moldorm · Lorule Ball and Chain Soldier · Arrghus
StreetPass Bosses
Bosses
Margoma · Arrghus · Moldorm · Blizzagia · The Lady's Pets ![]() · Stalchampion · Prismantus · The Lady
· Stalchampion · Prismantus · The Lady
Shadow Link x3![]()
Mini-Bosses
Electric Blob King · Electric Blob Queen · Hinox Brothers · Freezlord · Vulture Vizier · Grim Repoe · Gigaleon
Bosses
Windblight Ganon · Fireblight Ganon · Master Kohga · Thunderblight Ganon · Waterblight Ganon · Calamity Ganon · Dark Beast Ganon ![]()
Sub-Bosses
Stone Talus · Igneo Talus · Frost Talus · Molduga · Hinox · Blue Hinox · Black Hinox · Stalnox · Igneo Talus Titan · Molduking
Bosses
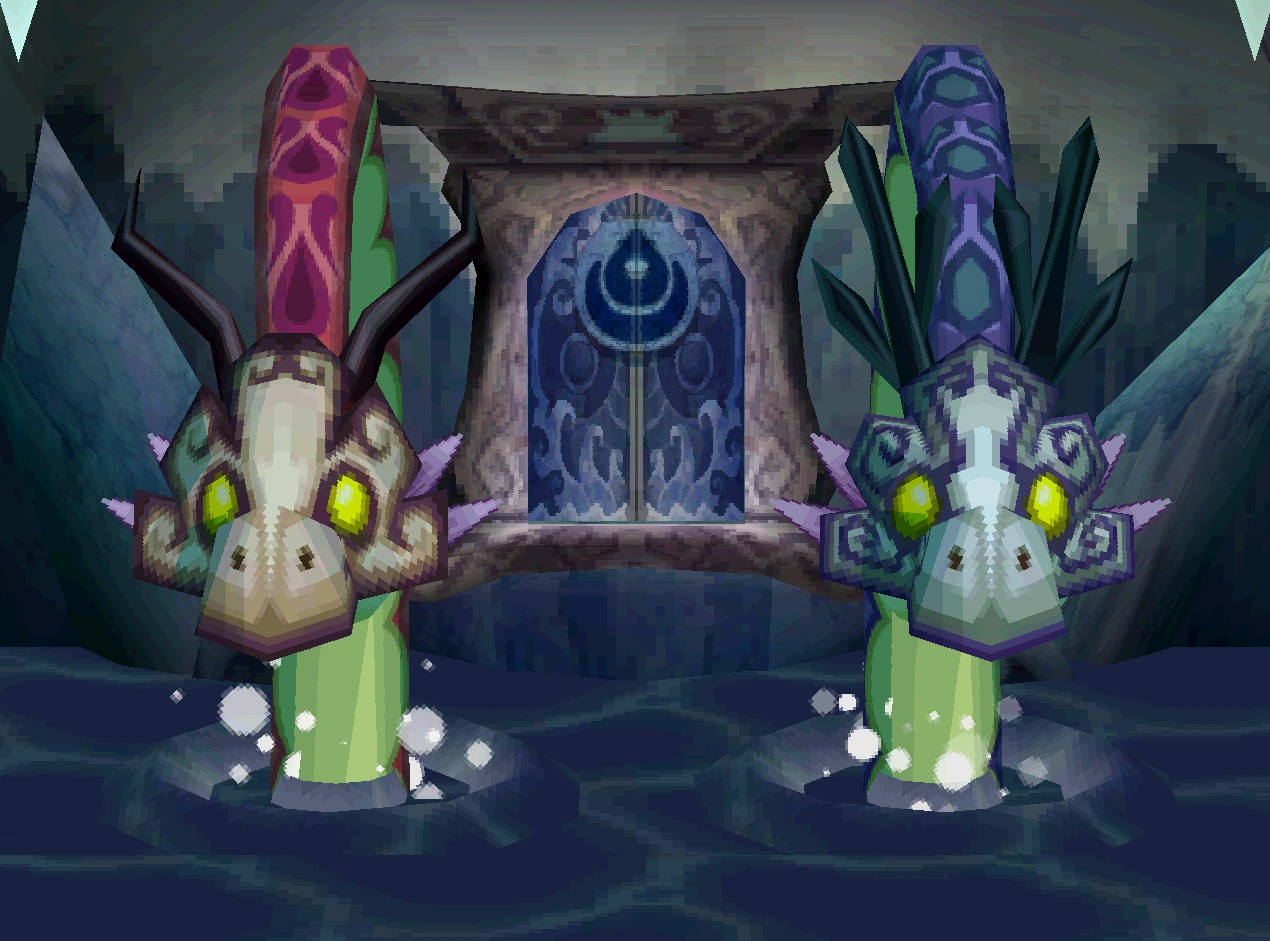
Colgera · Mucktorok · Marbled Gohma · Queen Gibdo · Phantom Ganon · Seized Construct · The Demon King's Army · Demon King Ganondorf · Demon Dragon ![]()
Sub-Bosses
Flame Gleeok · Frost Gleeok · Sludge Like · Thunder Gleeok · King Gleeok · Yunobo · Frox · Flux Construct · Moragia · Molduga · Hinox · Stalnox · Frost Talus · Igneo Talus · Stone Talus · Battle Talus · Stone Talus (Luminous) · Ganondorf · Master Kohga · Phantom Ganon
| |||||||||||||||||||||||
.png)
.png)
Template:FireEnemy