Ido1111@legacy41971104 (talk | contribs) No edit summary |
Ezlospirit (talk | contribs) (added Keeps section; added bosses to "Enemies and Bosses" gallery; fixed a link) |
||
| Line 1: | Line 1: | ||
| − | {{ |
+ | {{Stub}} |
| + | {{Dungeons |
||
| − | |name = Ordona |
||
| + | |name = Temple of the Sacred Sword |
||
| − | |image = [[File:Ordana.png|250px]] |
||
| + | |type = stage |
||
| ⚫ | |||
| + | |image = [[File:HW Temple of the Sacred Sword.png|300px]] |
||
| − | |title = |
||
| ⚫ | |||
| − | |race = [[Spirits of Light|Light Spirit]] |
||
| + | |location = |
||
| ⚫ | |||
| ⚫ | |||
| − | |attributes = Guardian of the [[Ordona Province]] |
||
| + | |item = [[Master Sword]] |
||
| − | |gender = |
||
| + | |quest = |
||
| ⚫ | |||
| + | |mini-boss = [[Wizzro|Lana?]] |
||
| − | |era = [[Zelda Timeline#The Era of Twilight|Era of Twilight]] |
||
| + | |boss = [[Wizzro]] |
||
| − | |other = |
||
| ⚫ | |||
| − | |theme music = |
+ | |theme music = |
| + | |strategy = |
||
}} |
}} |
||
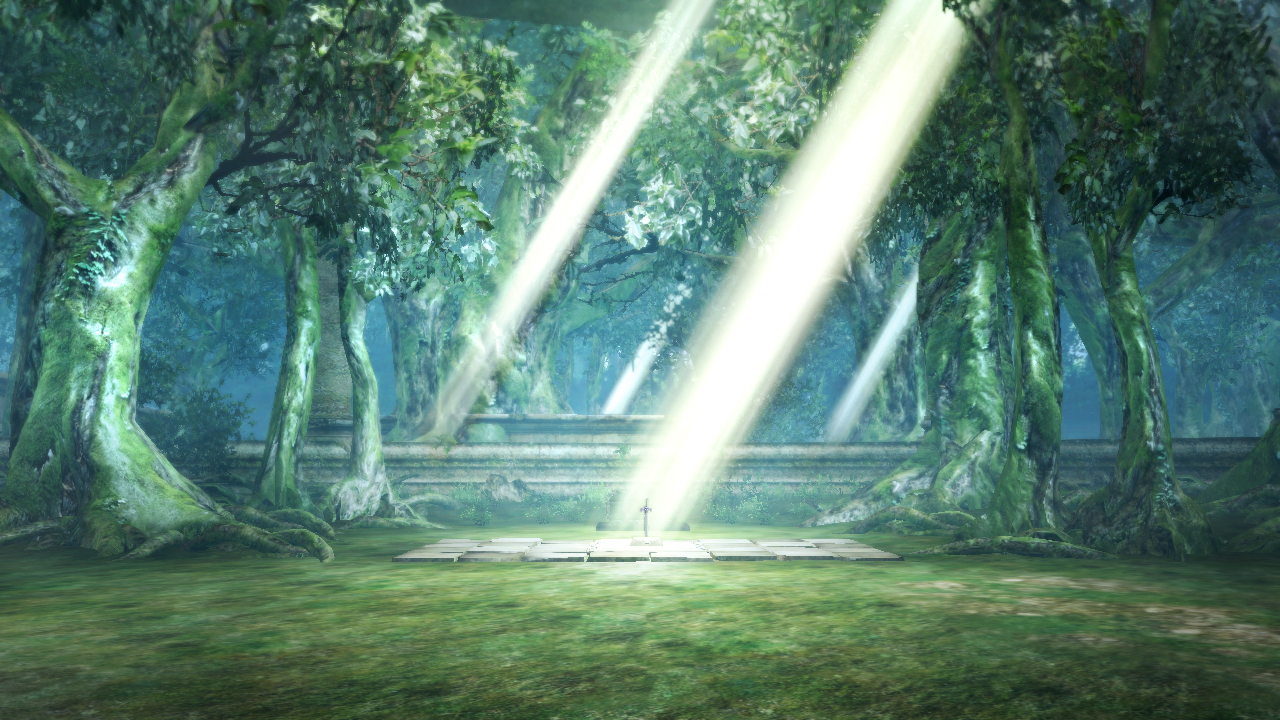
| + | The '''Temple of the Sacred Sword''' is a stage in {{HW}}. It contains the Scenario "'''The Sacred Sword'''," the eleventh Scenario in [[Legend Mode]]. |
||
| − | '''Ordona''' is the [[Spirits of Light|Spirit of Light]] that [[Link]] encounters in [[Ordona Province]] while he is in [[Wolf Link|Wolf form]].<ref>{{cite|Come...to my spring... You have...been transformed...by the power...of shadow... [...] O brave youth... I am one of four light spirits that protect Hyrule at the behest of the gods. I am Ordona.|Ordona|TP}}</ref> The spirit informs Link of the other three light spirits and the reason for their being in [[Hyrule]]; to protect it.<ref>{{cite|I am one of four light spirits that protect Hyrule at the behest of the gods. [...] My brethren in Hyrule have already had their light stolen by these fell beasts. The entire kingdom has been reduced to a netherworld ruled by the cursed powers of darkness.|Ordona|TP}}</ref> |
||
| + | |||
| − | Although Ordona is one of the [[Spirits of Light|Spirits]], it appears that it may not be considered as important as the other three. When talking to [[Lanayru (Spirit)|Lanayru]], it says, "the goddesses ordered us three light spirits" to seal away the evil magic of the [[Dark Interlopers|Interlopers]],<ref>{{cite|Among those living in the light, interlopers who excelled at magic appeared. Wielding powerful sorcery, they tried to establish dominion over the Sacred Realm. It was then that the goddesses ordered us three light spirits to intervene. We sealed away the great magic those individuals had mastered. You know this magic...|[[Lanayru (Spirit)|Lanayru]]|TP}}</ref> which could imply that either Ordona was not present at the time of the incident, that Ordon and Ordona are not considered as part of Hyrule (as mentioned later in the game by Shad, who says "I don't believe he's from Hyrule proper at all"),<ref>{{cite|Oh, no, I don't believe he's from Hyrule proper at all. No, my understanding is that he's from the small neighboring province of Ordona.|[[Shad]]|TP}}</ref> that Ordona is the least of the Spirits, seeing as it doesn't seem to share direct relation to a [[Golden Goddesses|Goddess]] (La'''''nayru''''', El'''''din''''', and '''''Faro'''''n]].), or that Nintendo simply forgot to include Ordona in the story. |
||
| + | ==The Sacred Sword== |
||
| − | __NOTOC__ |
||
| + | After sealing the [[Gate of Souls|Gates of Souls]] in each era, [[Link]] and the [[Forces#Hyrulean Forces|Hyrulean Forces]] reunite and discuss their next plan of action to defeat [[Cia]]. When Link and [[Princess Zelda]] find their [[Triforce]] pieces returned, [[Lana]] is confident that Cia can be defeated, but Zelda insists only after they have retrieved the [[Master Sword]] from the Temple of the Sacred Sword. The Hyrulean Forces spread out to locate the sword within the temple's empty ruins. Zelda states that in order to find it, they must work together and awaken the three sealed statues.<ref>{{Cite|The Master Sword is up ahead. We must work together to retrieve it! First we must awaken the three sealed statues.|Zelda|HW}}</ref> Lana leaves to search for them. |
||
| − | ==Trivia== |
||
| + | |||
| − | *The spirit appears in the form of an [[Ordon Goat]], the indigenous animal of [[Ordon Village]]. |
||
| + | Link approaches the temple doors, and finds that they are closed. The [[Forces#Rogue Forces|Ghost Forces]] then suddenly appear and attack the Hyrulean Forces to defend the temple<ref>{{cite|Those who would threaten the temple... will be punished!|Ghost Soldier|HW}}</ref> (They will also appear if Lana finds a statue). While the Hyrulean Forces fight back, Zelda tells [[Darunia]], [[Midna]], and [[Impa]] that their abilities will be required to activate the sealed statues, and Link is tasked with keeping them safe. Impa leaves to search in the western part of the ruins, and eventually finds the Statue of Servitude there. Zelda asks her activate it. Link discovers two more sealed statues at the North and South Squares. Zelda asks Darunia to advance to the Statue of Wave and Flame in the South Square, and asks Midna to awaken the Statue of Twilight in the North Square. |
||
| − | *Ordona is the only one of the four light spirits that doesn't have a name that references one of the three goddesses. |
||
| + | |||
| + | Impa activates her sealed statue, but must remain until all the statues are fully awakened.<ref>{{cite|It seems that I have no choice but to wait here until the statues are fully awakened.|Impa|HW}}</ref> Link must also ensure that she stay safe while she waits. However more Ghost Soldiers appear around her, threatening her safety overtime. As Darunia enters the claimed Temple Square he is attacked by a [[Summoner]], but he is saved by Link, allowing him to continue. Midna is also attacked by a Summoner, and is saved as well by Link. They soon reach their respective statues and activate them. They remain to wait for the statues to fully awaken. |
||
| + | |||
| + | With the three statues activated, Zelda believes that the temple doors should open now. However Impa says that the statues require more time still. In response to the activated statues, more Ghost Force soldiers appear, including inside the temple walls. Zelda calls this unusual and believes that someone must be manipulating the soldiers.<ref>{{cite|Inside the temple? That is unusual... Someone must be manipulating them!|Zelda|HW}}</ref> Link leaves to locate the soldiers' commander. During his search, Lana eerily laughs and calls out to the soldiers to attack the Hyrulean Forces. Zelda feels that an evil presence is nearby. [[Proxi]] echoes her suspicions and believes that there is an impostor among them.<ref>{{cite|I feel it too. Ooh, that's creepy. You don't think there's an impostor around, do you?|Proxi|HW}}</ref> Link then discovers a Lana impostor in the central ruins, who is actually [[Wizzro]] in disguise and the one controlling the Ghost Forces. The two fight and Link defeats him, forcing Wizzro to temporarily retreat.<ref>{{cite|I guess you're not as easy to trick as you look... Oh well. I still won't let you win!|Lana (Wizzro)|HW}}</ref> Wizzro's defeat frees the Ghost soldiers from their control. The sealed statues are then fully awakened and opens the temple doors. Realizing that the one meant to wield the Master Sword has arrived, the Ghost Forces retreat.<ref>{{cite|The temple door is open! He who shall wield the Sacred Sword has appeared!|Ghost Soldier|HW}}</ref> Awakening the three statues however puts a toll on Impa, Darunia and Midna, forcing them to retreat from the battle. |
||
| + | |||
| + | Link enters the temple and finds its [[Keep]]s taken by the [[Forces#Dark Forces|Dark Forces]]. While searching for the Master Sword, he comes across two [[Aeralfos]] Gatekeepers guarding the gate to the sword's resting place. Link defeats them which opens the gate. Inside Link pulls the Master Sword from its pedestal. Wizzro then reappears and tries to fire a blast from behind, but Link deflects it with the Master Sword and they engage in battle. Wizzro retreats when his health is down to half, but reappears outside of the temple along with enemy reinforcements to attack Zelda. She retreats with the Hyrulean Forces to the temple. Link finds Wizzro at the West Square and fights him again, this time defeating the wizard. Wizzro accepts his defeat and begrudgingly reveals where Cia is hiding.<ref>{{cite|If you want Cia, you'll find her in the Temple of Souls. But she's not going to be happy.|Wizzro|HW}}</ref> With the Master Sword now in Link's possession, Zelda declares their next objective to find Cia.<ref>{{cite|We have our objective--travel to the Temple of Souls and use the Master Sword to defeat Cia!|Zelda|HW}}</ref> |
||
| + | |||
| + | ===Enemies and Bosses=== |
||
| + | <gallery> |
||
| + | File:HW Aeralfos.png|[[Aeralfos]] |
||
| + | File:HW Bokoblin.png|[[Bokoblin]]s |
||
| + | File:HW Bokoblin Captain.png|Bokoblins (Shield) |
||
| + | File:HW Fiery Aeralfos.png|[[Fiery Aeralfos]] |
||
| + | File:HW Ghost Captain.png|[[Captain (Hyrule Warriors)|Ghost Captain]] |
||
| + | File:HW Ghost Soldier.png|[[Ghost Soldier]] |
||
| + | File:No Image.png|[[Redead Knight]]s |
||
| + | File:HW Summoner Ghost.png|[[Summoner]] |
||
| + | </gallery> |
||
| + | <gallery> |
||
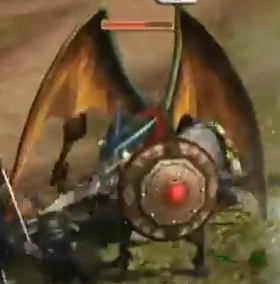
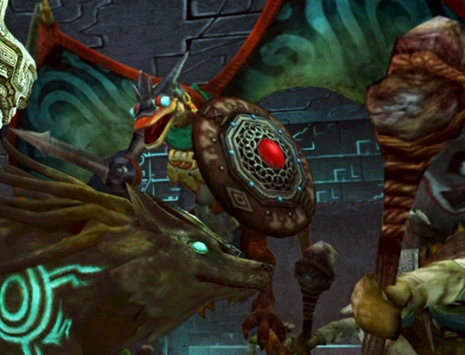
| + | File:HW False Lana.png|[[Wizzro|Lana?]] |
||
| + | File:HW Wizzro.png|[[Wizzro]] |
||
| + | </gallery> |
||
| + | |||
| + | ==[[Keep]]s== |
||
| + | *Central Keep |
||
| + | *N. Entrance Keep |
||
| + | *S. Entrance Keep |
||
| + | *[[Pedestal of Time|Sacred Pedestal]] |
||
| + | *North Square |
||
| + | *South Square |
||
| + | *Temple Square |
||
| + | *N. Temple Hall |
||
| + | *S. Temple Hall |
||
| + | *Town Entrance {{Exp|referred to as West Square in 'The Sacred Sword'}} |
||
| + | |||
| + | ==Collectibles== |
||
| + | {| class=wikitable style="width:100%" |
||
| + | ! colspan=2 | Item |
||
| + | ! colspan=1 | Location |
||
| + | ! colspan=1 | Condition |
||
| + | |- |
||
| + | ! colspan=4 | The Sacred Sword |
||
| + | |- |
||
| + | | [[File:HW Gold Skulltula Icon.png|45px]] |
||
| + | | [[Gold Skulltula]] |
||
| + | | Underneath the boulder in the northwest corner of the map. |
||
| + | | Defeat 1000 enemies |
||
| + | |- |
||
| + | | [[File:HW Gold Skulltula Icon.png|45px]] |
||
| + | | Gold Skulltula<br>(Hard Mode) |
||
| + | | Out in the room with the Master Sword where you first encounter Wizzro. |
||
| + | | Defeat 2,000 enemies, discover all the sealed statues, and repel Wizzro. |
||
| + | |- |
||
| + | | [[File:Heart Piece Icon TP.png|45px]] |
||
| + | | [[Heart Container#Piece of Heart|Piece of Heart]] |
||
| + | | Capture the N. Temple Hall. |
||
| + | | Play as Lana |
||
| + | |- |
||
| + | | [[File:Heart Container Icon TP.png|45px]] |
||
| + | | [[Heart Container]] |
||
| + | | Underneath the Boulder south of the Town Entrance. |
||
| + | | Play as Zelda |
||
| ⚫ | |||
==Gallery== |
==Gallery== |
||
<gallery> |
<gallery> |
||
| + | File:HW Temple of the Sacred Sword 2.png|Interior of the Temple of the Sacred Sword |
||
| − | File:ordoncept.jpg|Ordona (spirit) |
||
| + | File:HW Temple of the Sacred Sword 3.png|The resting place of the Master Sword |
||
| + | File:HW Link Pulling Master Sword.png|Link obtaining the Master Sword |
||
</gallery> |
</gallery> |
||
| − | == |
+ | ==Trivia== |
| + | *The temple greatly resembles the [[Temple of Time]] and surrounding [[Market|Castle Town Market]] from {{OoT}} and {{TP}}. |
||
| − | [[Zelda Wiki:Ordona_-_The_Guardian_Spirit|Ordona - The Guardian Spirit]]. |
||
| + | *After clearing "The Sacred Sword" the first time, Zelda, Impa, Darunia, Midna, [[Princess Ruto|Ruto]], [[Agitha]], [[Fi]] and Lana all become playable in this Scenario in Legend Mode. If playing as Zelda, Ruto leads the Hyrulean Forces. If playing as Darunia, Ruto activates the Statue of Wave and Flame.<ref>{{cite|Ruto, that is the Statue of Wave and Flame. You should have the ability to wake it.|Zelda|HW}}</ref> If playing as Midna, Agitha activates the Statue of Twilight. If playing as Impa, Fi activates the Statue of Servitude. If playing as Lana, it is Fi who first volunteers to search for the sealed statues. |
||
| ⚫ | |||
| − | <br> |
||
{{Names |
{{Names |
||
| − | | |
+ | |en= |
| − | |nwidth= |
||
| ⚫ | |||
|enM= |
|enM= |
||
| − | |ja= {{Japanese| |
+ | |ja= {{Japanese|聖剣の神殿|Seiken no Shinden}} |
| − | |jaM= |
+ | |jaM= Same as English |
| − | |es= |
+ | |es= |
|esM= |
|esM= |
||
| − | |esS= |
+ | |esS= |
| − | |esSM= |
+ | |esSM= |
|esL= |
|esL= |
||
| − | |esLM= |
+ | |esLM= |
| − | |fr= |
+ | |fr= |
|frM= |
|frM= |
||
|frF= |
|frF= |
||
| − | |frFM= |
+ | |frFM= |
|frC= |
|frC= |
||
| − | |frCM= |
+ | |frCM= |
| ⚫ | |||
| − | |de= {{de|Lichtgeist Latoan|Latoan}} |
||
|deM= |
|deM= |
||
| − | |it= |
+ | |it= |
|itM= |
|itM= |
||
| − | | |
+ | |pt= |
| + | |ptM= |
||
| + | |ptP= |
||
| + | |ptPM= |
||
| + | |ptB= |
||
| + | |ptBM= |
||
| + | |nl= |
||
| + | |nlM= |
||
| + | |ru= |
||
| + | |ruM= |
||
| + | |ko= |
||
|koM= |
|koM= |
||
| + | |ch= |
||
| ⚫ | |||
| + | |chM= |
||
| + | |chT= |
||
| + | |chTM= |
||
| + | |chS= |
||
| + | |chSM= }} |
||
| + | |||
| ⚫ | |||
| + | |||
| + | {{ScenariosHW}} |
||
| − | [[Category: |
+ | [[Category:Places in Hyrule Warriors]] |
Revision as of 05:27, 14 July 2015
Template:Dungeons The Temple of the Sacred Sword is a stage in Hyrule Warriors. It contains the Scenario "The Sacred Sword," the eleventh Scenario in Legend Mode.
The Sacred Sword
After sealing the Gates of Souls in each era, Link and the Hyrulean Forces reunite and discuss their next plan of action to defeat Cia. When Link and Princess Zelda find their Triforce pieces returned, Lana is confident that Cia can be defeated, but Zelda insists only after they have retrieved the Master Sword from the Temple of the Sacred Sword. The Hyrulean Forces spread out to locate the sword within the temple's empty ruins. Zelda states that in order to find it, they must work together and awaken the three sealed statues.[1] Lana leaves to search for them.
Link approaches the temple doors, and finds that they are closed. The Ghost Forces then suddenly appear and attack the Hyrulean Forces to defend the temple[2] (They will also appear if Lana finds a statue). While the Hyrulean Forces fight back, Zelda tells Darunia, Midna, and Impa that their abilities will be required to activate the sealed statues, and Link is tasked with keeping them safe. Impa leaves to search in the western part of the ruins, and eventually finds the Statue of Servitude there. Zelda asks her activate it. Link discovers two more sealed statues at the North and South Squares. Zelda asks Darunia to advance to the Statue of Wave and Flame in the South Square, and asks Midna to awaken the Statue of Twilight in the North Square.
Impa activates her sealed statue, but must remain until all the statues are fully awakened.[3] Link must also ensure that she stay safe while she waits. However more Ghost Soldiers appear around her, threatening her safety overtime. As Darunia enters the claimed Temple Square he is attacked by a Summoner, but he is saved by Link, allowing him to continue. Midna is also attacked by a Summoner, and is saved as well by Link. They soon reach their respective statues and activate them. They remain to wait for the statues to fully awaken.
With the three statues activated, Zelda believes that the temple doors should open now. However Impa says that the statues require more time still. In response to the activated statues, more Ghost Force soldiers appear, including inside the temple walls. Zelda calls this unusual and believes that someone must be manipulating the soldiers.[4] Link leaves to locate the soldiers' commander. During his search, Lana eerily laughs and calls out to the soldiers to attack the Hyrulean Forces. Zelda feels that an evil presence is nearby. Proxi echoes her suspicions and believes that there is an impostor among them.[5] Link then discovers a Lana impostor in the central ruins, who is actually Wizzro in disguise and the one controlling the Ghost Forces. The two fight and Link defeats him, forcing Wizzro to temporarily retreat.[6] Wizzro's defeat frees the Ghost soldiers from their control. The sealed statues are then fully awakened and opens the temple doors. Realizing that the one meant to wield the Master Sword has arrived, the Ghost Forces retreat.[7] Awakening the three statues however puts a toll on Impa, Darunia and Midna, forcing them to retreat from the battle.
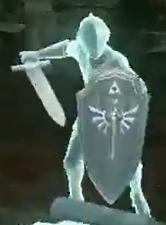
Link enters the temple and finds its Keeps taken by the Dark Forces. While searching for the Master Sword, he comes across two Aeralfos Gatekeepers guarding the gate to the sword's resting place. Link defeats them which opens the gate. Inside Link pulls the Master Sword from its pedestal. Wizzro then reappears and tries to fire a blast from behind, but Link deflects it with the Master Sword and they engage in battle. Wizzro retreats when his health is down to half, but reappears outside of the temple along with enemy reinforcements to attack Zelda. She retreats with the Hyrulean Forces to the temple. Link finds Wizzro at the West Square and fights him again, this time defeating the wizard. Wizzro accepts his defeat and begrudgingly reveals where Cia is hiding.[8] With the Master Sword now in Link's possession, Zelda declares their next objective to find Cia.[9]
Enemies and Bosses
- HW Bokoblin.png
- HW Bokoblin Captain.png
Bokoblins (Shield)
- HW Ghost Soldier.png

Redead Knights


- HW False Lana.png
- HW Wizzro.png
Keeps
- Central Keep
- N. Entrance Keep
- S. Entrance Keep
- Sacred Pedestal
- North Square
- South Square
- Temple Square
- N. Temple Hall
- S. Temple Hall
- Town Entrance
Collectibles
| Item | Location | Condition | |
|---|---|---|---|
| The Sacred Sword | |||
| Gold Skulltula | Underneath the boulder in the northwest corner of the map. | Defeat 1000 enemies | |
| Gold Skulltula (Hard Mode) |
Out in the room with the Master Sword where you first encounter Wizzro. | Defeat 2,000 enemies, discover all the sealed statues, and repel Wizzro. | |
| File:Heart Piece Icon TP.png | Piece of Heart | Capture the N. Temple Hall. | Play as Lana |
| File:Heart Container Icon TP.png | Heart Container | Underneath the Boulder south of the Town Entrance. | Play as Zelda |
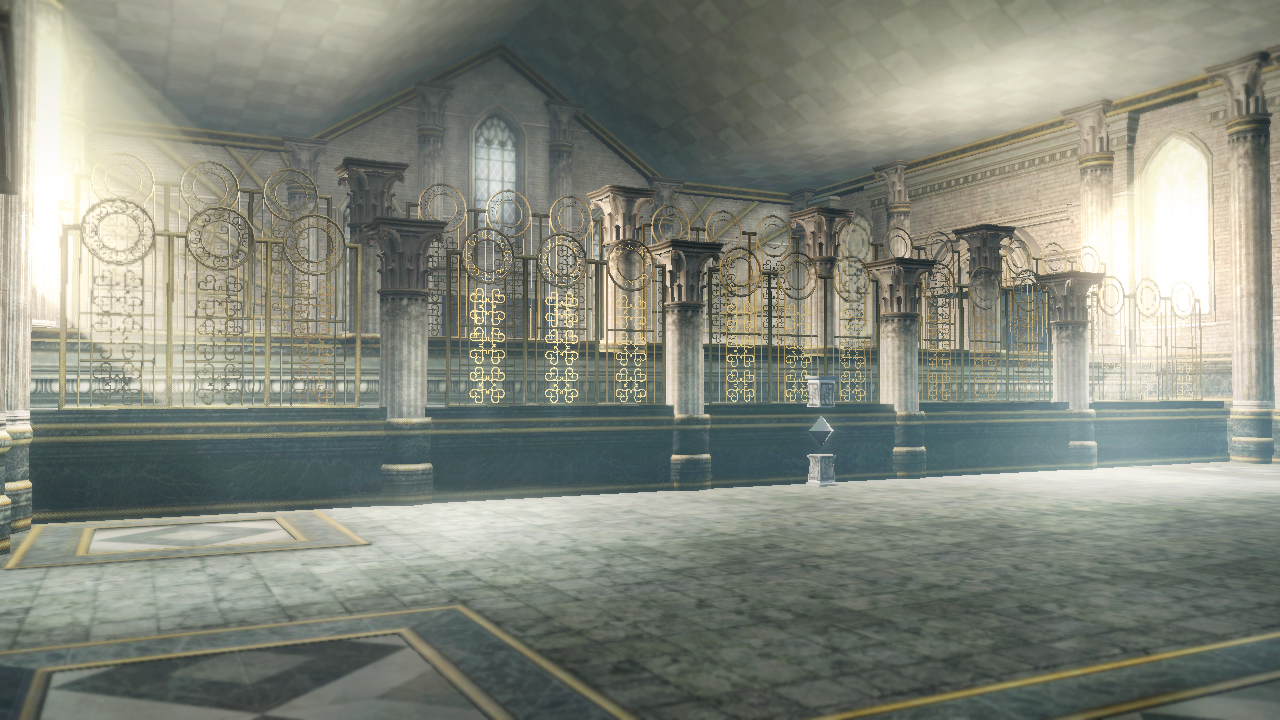
Gallery
Interior of the Temple of the Sacred Sword
The resting place of the Master Sword
Link obtaining the Master Sword

Trivia
- The temple greatly resembles the Temple of Time and surrounding Castle Town Market from Ocarina of Time and Twilight Princess.
- After clearing "The Sacred Sword" the first time, Zelda, Impa, Darunia, Midna, Ruto, Agitha, Fi and Lana all become playable in this Scenario in Legend Mode. If playing as Zelda, Ruto leads the Hyrulean Forces. If playing as Darunia, Ruto activates the Statue of Wave and Flame.[10] If playing as Midna, Agitha activates the Statue of Twilight. If playing as Impa, Fi activates the Statue of Servitude. If playing as Lana, it is Fi who first volunteers to search for the sealed statues.
| Language | Name | Meaning | |
|---|---|---|---|
| Japanese | Template:Japanese | Same as English | |
References
- ↑ "The Master Sword is up ahead. We must work together to retrieve it! First we must awaken the three sealed statues." — Zelda (Hyrule Warriors)
- ↑ "Those who would threaten the temple... will be punished!" — Ghost Soldier (Hyrule Warriors)
- ↑ "It seems that I have no choice but to wait here until the statues are fully awakened." — Impa (Hyrule Warriors)
- ↑ "Inside the temple? That is unusual... Someone must be manipulating them!" — Zelda (Hyrule Warriors)
- ↑ "I feel it too. Ooh, that's creepy. You don't think there's an impostor around, do you?" — Proxi (Hyrule Warriors)
- ↑ "I guess you're not as easy to trick as you look... Oh well. I still won't let you win!" — Lana (Wizzro) (Hyrule Warriors)
- ↑ "The temple door is open! He who shall wield the Sacred Sword has appeared!" — Ghost Soldier (Hyrule Warriors)
- ↑ "If you want Cia, you'll find her in the Temple of Souls. But she's not going to be happy." — Wizzro (Hyrule Warriors)
- ↑ "We have our objective--travel to the Temple of Souls and use the Master Sword to defeat Cia!" — Zelda (Hyrule Warriors)
- ↑ "Ruto, that is the Statue of Wave and Flame. You should have the ability to wake it." — Zelda (Hyrule Warriors)
| ||||||||||||||||||||